The toad (as in towed), dinghy or whatever name you give it. Most of us pull a car behind us so that we have a way to get around when the coach is parked. Pulling up stakes every time you need to run to the store is just not practical.
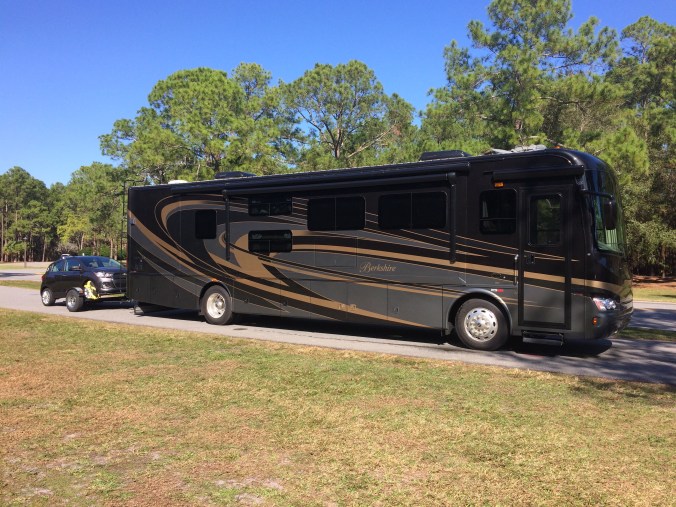
Initially we had “Sparky”. A Chevrolet Spark. Fun to drive, and most importantly it was light. Most states require brakes on anything over 3000 pounds behind you, and Sparky with its front wheels up on the dolly came in well South of that. So it was simple. Onto the dolly, strap it down, plug in lights hook up safety chains and off we go. Actually, strapping it down was a bit of a hassle, especially in foul weather. I got pretty good at it but still.
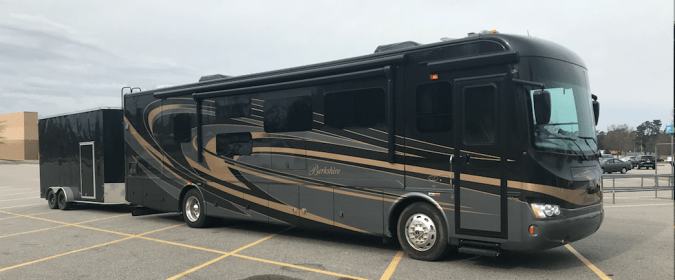
Of course we also had the monster trailer. Sparky would fit in it, together with bikes, chairs, grills and a kitchen sink. A bit of a thing to drag around, but hey, at least you can back it up. (One can not backup a dolly). But, strapping Sparky down in there was also a bit of a pain.
And, while Sparky was fun to drive in a go cart sort of way, with more than two people and a loaf of bread it got pretty tight. And, Sparky was also our spare car at home and equally limited for that task, especially in the winter as that was not its forté. So, more functionality, more fun, less time (un)hooking. Yup, flat towing.
What does it take to flat tow a vehicle? Mind you, every car is a little different, but in broad terms the following applies to all. I am not going to review everything that’s out there…. just do a Google search for “the best XYX”. There’s also a ton of Youtube videos.
Not all vehicles are towable, and even if they are, some are more complicated to configure than others. (Some need to run every 250 miles to lubricate certain drive train parts for instance.)
Read about the various candidates for flat towing here. If the link goes stale, Google the key words. https://www.motorhome.com/download-dinghy-guides
NOTE: The ONLY reliable source of information for whether a vehicle can be flat towed and the procedure required for doing so is the owners manual for that specific model year. There is a LOT of bad information out there. Car makers change things from one month to another…. read the book!
Based on my research I picked the Jeep (aside from the fact that it is a hoot to play with) as it has a MANUAL TRANSFER CASE. This is the hardware between transmission and wheels. It controls 2 versus 4 wheel drive, and hi versus low gearing. When you put the big handle in “N” the wheels are disconnected from the transmission/engine. Period. They spin. No fuss, no muss.
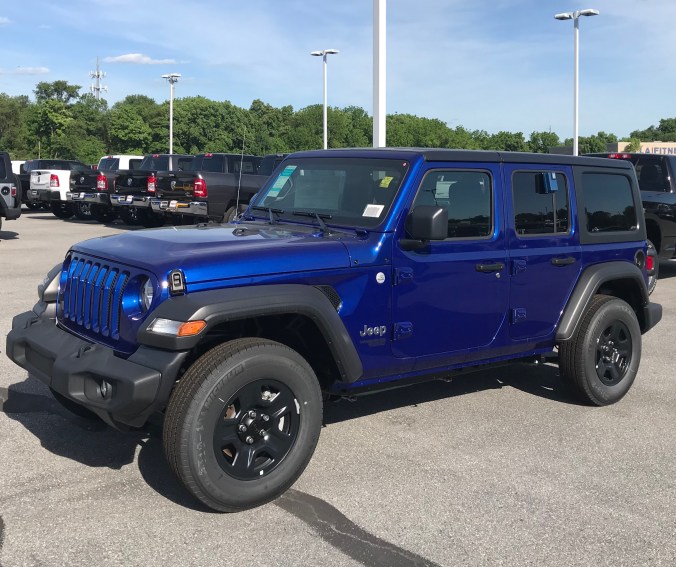
Pretty stripped down (manual windows lol) but with auto, the Turbo-4, tinted glass, floor mats and hard top. Got a decent price through the FCOC (Freightliner Chassis Owners Club) affiliate program.
There are a few big equipment names in this game. One of the favorites is Blue Ox. They are good, they are not cheap. There are others: Reese, Curt, Ready Brake, Roadmaster just to name a few. Some systems require more work and or are more complicated to install than others. This is something to think about whether you are doing it yourself, or doing it with a check book. I don’t mind doing things, but hey simple IS better. I also wanted to keep the cost as low as possible without sacrificing safety.
So, once we have determined that the toad is towable we need the following:
- 1: Reinforcement and connection points for the tow bar on the toad.
- 2: A tow bar with safety lines/chains.
- 3: Lighting on the toad, to follow the lead of the coach. (Like a trailer)
- 4: Since most are over 3000#, brakes on the toad.
- 5: A “Breakaway System”. This activates the brakes should the toad break loose from the coach.
1: Reinforcement/connection points. Most of the time one mounts what is called a “Base Plate”. It’s a piece of steel that is designed to attach to the strong points of the toad and provide connection points for the tow bar. Depending on vehicle they can be simple to install, or require a lot of disassembly/trimming of parts pieces. For the Jeep they ran $500-$700. I’d say that’s about average. BUT…. it’s a JEEP, the most accessorized vehicle in the universe. So in my internet travels I came across custom bumpers! Designed for off roading they can be used to mount winches, recovery hooks and it turns out some (not all) have D-rings that are suitable to mount a tow bar on to! COOL. Looks better, a winch is a “need”, you know in case the coach gets stuck, a few LED lights on there won’t hurt and I can mount the tow bar to it! After much research I settled on the Smittibuilt XCR Gen II. A “stubby”. Got it on Amazon, with 5% for the Amazon card just this side of $600. I won’t get into the actual installation, there’s plenty of Youtube material on that. Let’s just say it took XX hours and here is the result.
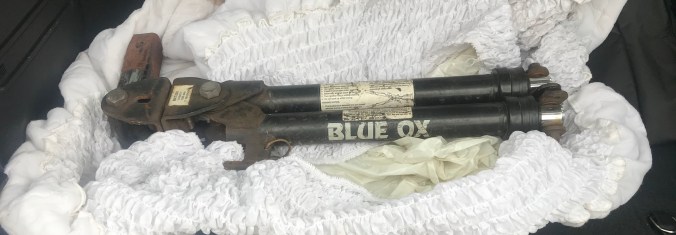
2: Tow bar. Huge price range. Not always sure here if you get what you’re paying for. Starting at a hundred and a half you can get a rigid steel simple bar that hooks up to a 2″ ball…. 5000 pound limit. It’s enough but not by much. And then there was the little blip on one of them that said “The manufacturer recommends not exceeding 55mph”. Hmmmm, that’s not warm and fuzzy. On the other end are the Blue Ox, Roadmaster Readibrake etc etc…. 6-7-$800. Ouch. Then “Big Data” came to the rescue. Apparently “they” saw I was looking at tow bars on line, so my FB market place feed started showing used ones in the area. And lookie there, a used Blue Ox BX7330 Aventa….. Older and discontinued, steel and heavy. But VERY solid and rated for 10,000 pounds. Perfect…. and the price, well I am almost but not quite ashamed to say I paid $100.
3: Lighting. There’s a few ways to go about this. One is to feed electricity directly to the lights on the toad and use them. This requires the use of a “diode kit” so you don’t interfere with the functioning of the vehicle when driving it. About $120, and quite a bit of wiring. Personally, I don’t like messing with the vehicles electrical system. Like the modern coaches with the multiplex systems, cars now to have ethernet architectures and body control modules and power delivery modules and it can all go horribly haywire if you do it wrong. So my objective is to have the electrical system in the toad asleep 100%. The second technique is to install an extra bulb inside the tail light fixtures. Hmmmm…. said it was “universal”. Which means “fits some, maybe” in my world. And again, lots of wiring. But, it IS completely separate from the toads electrical system. Another solution is a set of lamps on the back. Most of them are magnetic and they start from $30 for a simple round one and then go up as they get into LED lights etc. Run a long wire to the coach and voila. But there is another, more elegant option. The wireless LED systems. Not the cheapest at $250.00 ish, but very nice. Charge the light bar, or plug it into a hot power source an plug the plug into the coaches trailer connection. Look at that…..
4: Brakes. This is NOT the place to skimp. Should the unthinkable happen, the judge will agree with that. There’s a variety of systems, some portable some permanent. Google around. I went with the Blue Ox Patriot II. Portable, only needs 12V and a breakaway wire (more on that later) so it is easy to install and portable to another vehicle. NOT cheap. List is $1500 ish, I found it just under $1200.00 on Amazon, again, with the 5% points.
5: The breakaway system for the Patriot is about $120.00 One piece mounts under the coach bumper, the other end goes into the toad to the Patriot. Simple, effective.
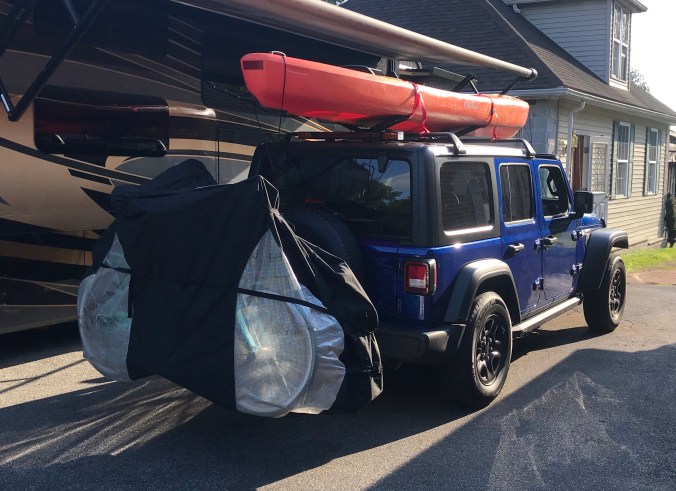
So there it is….. how I did it. Add a few bikes on the back of the toad (another reason to have a light bar on the roof as I am blocking the toad lights when the cover is on) and the kayak on the roof. Off we go, into the wild blue yonder.