The Dragonship came with audio and visual entertainment systems.
On the visual side things were pretty well set up. Although optional our unit had a Winegard automatic satellite dish installed which was Direct TV compatible. Since we have Direct TV at home, it was a matter of ordering an additional receiver/dvd and installing it in the entertainment center. Signal is provided to 4 (yes FOUR) TV’s through an HDMI splitter box. There are 4 inputs, any of which can be watched at any of the 4 TV’s. So far I’m using the satellite and the DVD.
Unless you have multiple satellite boxes (our dish supports up to two, not all do) the one satellite box determines which channel you are watching on all tv’s. So if you’re in the bedroom you would have to get up and go to the living room to change the channel. Bah. Now, remotes come in two styles. First is IR, or Infra Red which works “line of sight”where you have to aim at the box. The other is RF, or “Radio Frequency” which goes through walls and around corners up to a certain distance. These are increasingly being supplied and alleviate the getting up and going to the living room problem, but ours was not. This item made it RF…….
A few words about satellite dishes. There are three basic types. One you place outside and have to aim yourself. Find out roughly where the satellites are in the sky (there’s an app for that) and with a tone out of the satellite box you home in on the signal. Not too bad with normal definition dishes, but a challenge with High Def receivers. One step up are the automatic aiming satellites. This is what we have. Turn on the power and you’ll hear it humming away until it finds and locks on. These units come in portable which you place outside on the ground, or fixed mounted on the roof. We have the latter. The top level are the “trackers”. They find and lock on and follow the signal as you are driving around. Very nice, not cheap.
Sooo, the third or second time we turned on the dish we got an error: “No LNB voltage”. The most common cause is a fault in one of the coax cables on the unit. Not hard to replace and the part is cheap. I ordered one, but it has been behaving since. Figures. If it goes again I will replace the cable and document here.
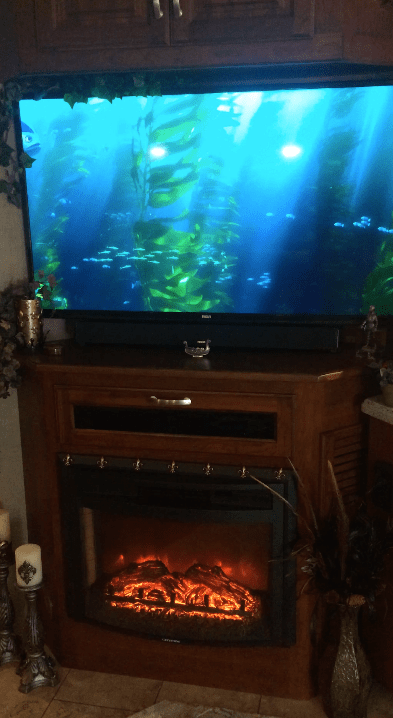
All in all, with the addition of the DirectTV tuner and the RF remote the visual system is more than adequate. You can watch movies or CNBC outside, in the living room or in bed. Or, and this is what we do most, you can play a DVD with an aquarium or beach scene.
_________________________________________________________________
Audio was a different story. A not too expensive RCA sound bar under the main TV, and an AM/FM receiver as part of the 7″ Navigation/AudioVisual unit in the dash. Two very small speakers overhead in the cockpit and that was it. Nope, not rocking the tunes with that setup, no waaay dude!
So here is a list of the improvements made, so far:
- XM Receiver
- Rooftop XM antenna
- Larger overhead speakers
- Subwoofer
- Two small speakers for driver seat
- Connect the in dash NAV/AV unit to the sound bar
_________________________________________________________________
XM Radio.
I love my music, and I HATE commercial radio. The playlists are sales driven and the commercials drive me over the edge. So, for me it’s XM radio. Good programming, a plethora of genres to choose from and no commercials. I have XM receivers in every car, shop and in my cave in the house.
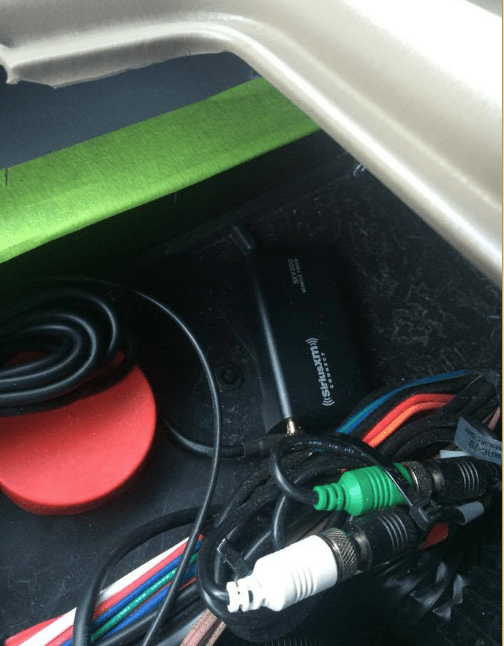
For every car I’ve ever bought that had satellite radio installed all I had to do was tune to channel zero, get the radio ID, go on line and add it to my account. Seconds later I’d be in business. So, I selected satellite on the Magnadyne LCD NAV/AV…… Surprise, not so fast Buster…… No one home. Well, after reading the manual, “SiriusXM ready” meant that I had to buy an SXV100 SiriusXM vehicle tuner with antenna. Hopping about on line I discovered few of these as they have been superseded by the SXV200 and 300. I threw the dice and ordered a 300. It works and was under $40. It plugs right into the back of the Magnadyne and I just sat the receiver on top of the heat manifold (see pic) it’s not going anywhere. It came with a small antenna which I led through the edge of the access hatch in the top of the dash to sit right there. Unobtrusive and functional, sort of, but the satellite screen on the Magnadyne was alive and we had sound!
Well, the satellites are in stationary orbits over our fair nation and due to the nature of the data waves the process is “line of sight”. Having the antenna inside works sometimes. You can move it around until you find a spot and you’re in business. Needless to say this does NOT work when driving. Lots of hissing interrupting the tunes!
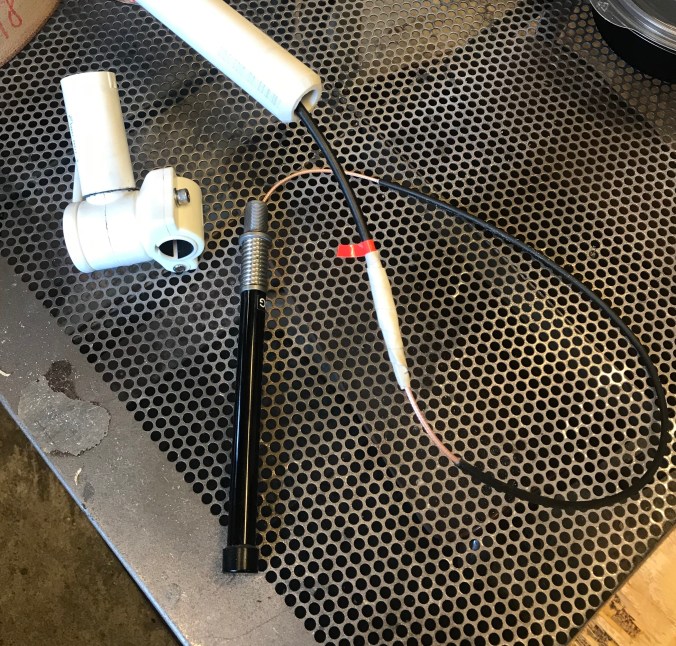
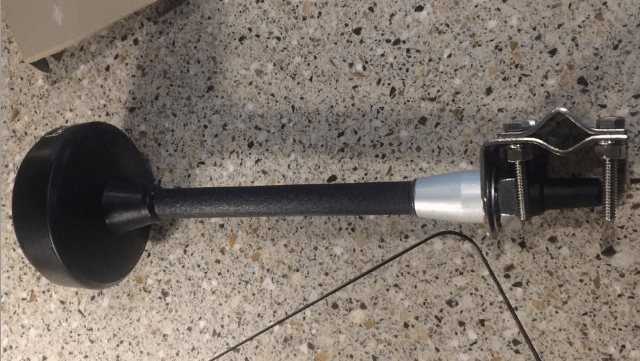
So, the antenna had to go outside, and above the roof with as clear a view of the sky as possible. I bought a BR-X-10 Truck Antenna (under $40) which looks like this:
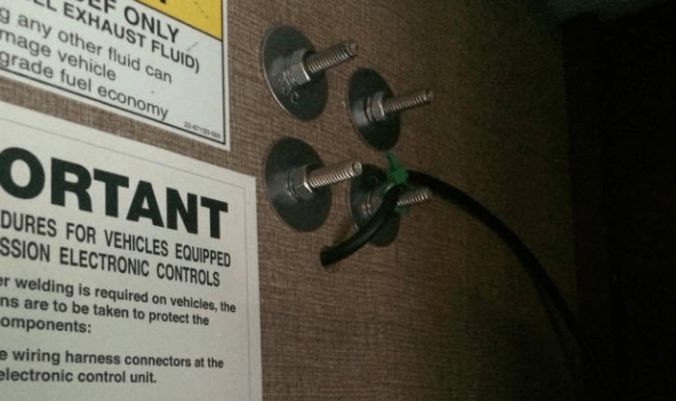
I found a spot to mount it where the bolts would go through and through with washers on the inside in the cabinet above the driver’s seat. I used black butyl tape to insure water tightness.

The way it looks on the inside in the cabinet:
Finally I ran the antenna wire down and forward out of the cabinet behind the valance to the A-pillar. This removes easily. The buttons are in fact snaps and pop right off revealing the screws. With the trim off I ran it straight down. Then, the easiest path is back along the dash way down by the left side window until near the defrost heater outlet where I went inside the dashboard and over to the receiver.


Now we had signal! In fact, during the shakedown trip we drove 2500 miles and only lost signal briefly for a few seconds, in Bradenton FL out of all places. I suspect it was a local anomaly and not my system.
_________________________________________________________________
Larger Overhead Speakers
As mentioned before, the audio output from the NAV/AV was two little speakers overhead in the cockpit. I wanted larger speakers there but I didn’t want to do a whole lot of demo in the ceiling. So, I bought two 6″x9″ JBL speakers and two 1-1/2″ spacers for same. Both from Crutchfield.

The magnet fit in the old hole, so it was a matter of connecting wires and screwing it all in.

Sound was now much improved but it needed some low end.
_________________________________________________________________
The Sub Woofer
This was a little more involved. On the back of the Magnadyne are 2 RCA plugs labeled “Woofer Left” and “Woofer Right”. I found out the hard way that these were not line level so I needed a powered sub. I get a MTX Audio RT8PT Universal Powered Subwoofer. Another owner used the same one and said it would fit in the center console. It did!
But to get it in there you have to make some room. The radio is in the way, as is one heater duct, and a variety of wires. I first tried the little “keys” that came with the radio to slide it out of it’s mount, but it wouldn’t budge. So then I removed the 6 screws that hold the center instrument panel, pulled it back and sat it on a stool with pillow. This gave me all kinds of access and made the job a lot easier than it would have been with just the radio out….After the panel was back I test fitted the woofer, speaker end in first so you can still get to the connections when it’s in place. You stand it up straight up in the console….it then turns and lays flat on the floor. Picture shows it standing up right before tilting.

So, with the woofer fit confirmed it was time for connections. It needs power and signal. With the access I had I was able to get the multi meter on the back of the “Radio” switch. There is a variety of connections but one of them is TWO red wires. I confirmed that these are hot when 1:The switch is “on”, OR 2:The ignition is “on” or in accessory mode. These wires were a decent gauge so I tapped in to one of them for power. I then did the same thing with the negative to the negative wire of the 12V outlet, which also is of a pretty decent gauge. Lastly, there are three connections to the woofer. Hot, Negative and “switched”. When this receives power it turns on the woofer. This allows a remote switch to turn it on and off. If you have a crazy high power setup (which we don’t here) you wire the power directly to the battery, and use the ignition/radio power switch to control the on/off of the woofer’s “switched” connection. Obviously this is not the case here so I made a jumper from there to the hot connection. Radio on=woofer on. All that was left was to plug in the signal wires and viola we have woof! The relative volume of the bass can be controlled through the equalizer in the NAV/AV but the Sub also came with a little wired volume control. I put it next to my shin under the dash. It has a little red LED which gives a nice glow on the floor at night.

Sound yet improved again!
_________________________________________________________________
Now, I love my tunes, and as she will remind me on a regular basis my wife is not deaf. So I ordered these surprisingly affordable little powered Altec Lansing mini speakers and put them on the dash in front of me. They have their own volume control and allow me to get that “little extra” on my side of the cockpit. They plug into an “audio out” in the back of the Magnadyne NAV/AV.

Sound improved yet again….
_________________________________________________________________
And last but not least I wanted to bring the sound further back into the living room. I looked at a lot of wireless options, and I tried to figure out how to get back in the ceiling (NOT easy). In the end I went with what I think is a pretty elegant solution. They plug into the same “audio out” RCA connection on the back of the Magnadyne as the minis (I used a pass through plug, effectively a splitter) and from there I ran RCA cable over the steering column into the left console. Like the center console the faux wood top comes of with just a hand full of screws and I led the cable out the back of the console at floor level. From there I went under the fridge and next to a coax cable along the wood trim UNDER the kitchen slide into the space under the TV, behind the fireplace. There are no rollers on the kitchen slide and the cable sits there undisturbed and out of sight, except for the few inches between the console and the fridge, but that is not a “focal point” by any means. So then I plugged into the RCA sound bar…… It has it’s own volume control and it has a remote so it can be controlled from the cockpit while driving. Less than $30 for a good improvement that will carry me at least a while, and the sound is now pretty decent. If anything I may upgrade the sound bar to a higher quality unit.
Unfortunately after installing this I noticed a “buzz” over the speakers when the big overhead lights in either the living or bedroom are on (They have dimmers). Unplugging the wire to the sound bar makes it go away, so somewhere along the line it’s picking something up. It is only noticeable when the audio volume is near zero, so it is barely a nuisance, but it is there.
And the sound yet improved to the point where I am now enjoying it very much. It’s not Bose, but it’s not bad. At some point I may upgrade the sound bar to improve TV/Movie sound as well as the living room end of the music.
So, round numbers: SiriusXM receiver $40, exterior antenna $40, improved cockpit speakers $70, powered sub-woofer $150, output to the sound bar $25….. and the mini’s $20 A lot of bang for the $345 or so bucks…….(All Amazon, no shipping).
______________________________________________________________________________________
Summer 2018.
Still pretty happy with the whole setup. The buzz got to me and I got tired of having to go in there and un-plug things so I added some switches in the sound wires to the dash speakers and sound bar.
Also….. it gets hot in the electronics compartment under the TV….too hot. So I removed the plexiglass and put in some metal grating…. 
There’s extra so you can do it more than once to get it just right…… Just remove the plastic strips in the back, use the plexiglas as a template.

And viola…… air flow and it looks nice.

—————————————————————————————————————————————-
Summer 2020
Up to this point we’ve had Direct TV in the house, so it was a no brainer to put a $7/month box in the coach, especially since it came with the satellite antenna on the roof setup for Direct TV.
But here we are a few years later and we’re cutting the cord in the house. We are streaming. Also have a Roku “box” in the coach for when we have good internet. But, that’s not always so for those times when were in the middle of nowhere WIFI wise we went with Dish for the simple reason that you can go month to month with them.
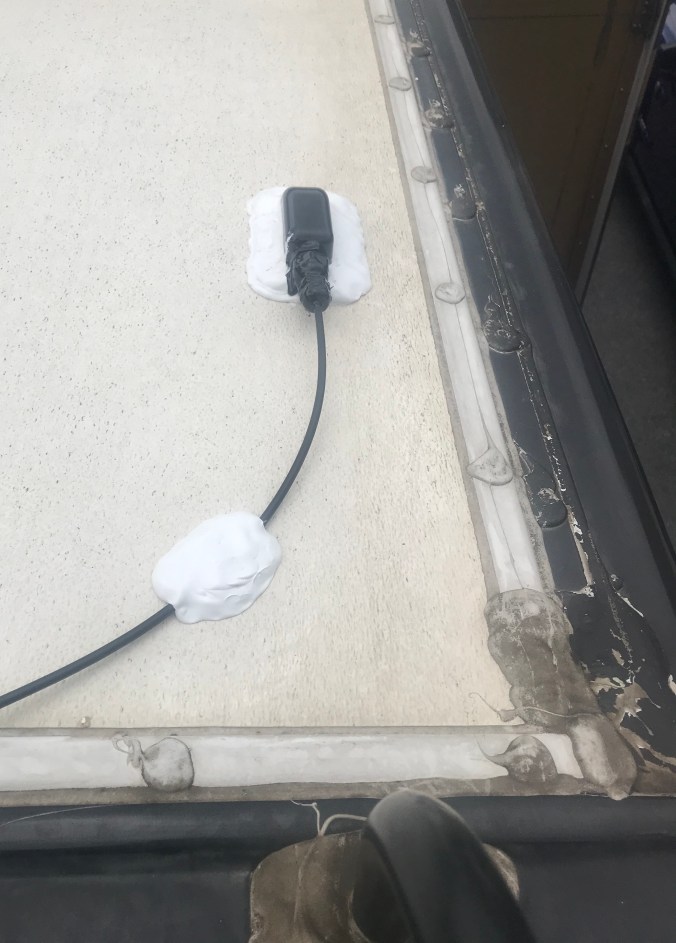
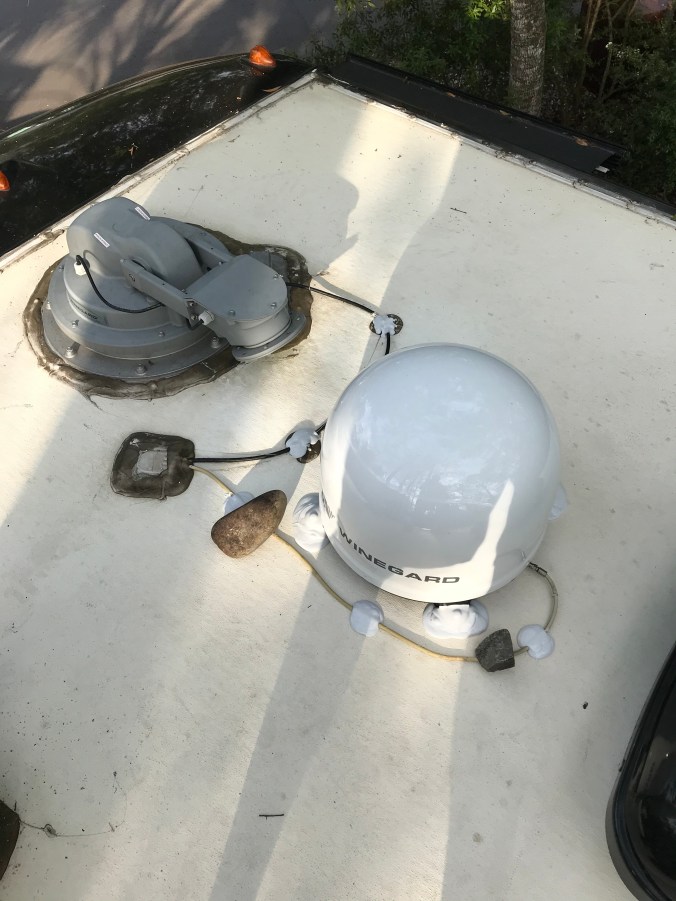
There are two options when doing this. There is a kit to convert the Winegard antenna to Dish….. but here I was standing in Campingworld (shhhh) and there was a sale I couldn’t pass up for the dome antenna and Wally box…. So I mounted it on the roof. Also ends any potential issues with the Winegard itself, of which there are plenty of examples. I was able to utilize one of the cables going inside from the Winegard, so with a connector in the cabinet below I was in business. I removed the saucer from the Winegard to make a little more space. Big advantage: You can’t forget to put the Dish antenna down…. it just lives in its dome. (Note, rocks are to keep cable down while the Dicor I used to secure the cable sets up……)
WIFI
Up to this point I’ve relied on tethering computers to my iPhone with an unlimited data plan. But, as described above, we are increasingly relying on WIFI for streaming TV. While I did get the ROKU box hooked up to my phone, streaming eats about 2 Gig per hour, and after an evening of watching TV AT&T sent me a nice message that I had used up 75% of my tethering data (yes, that’s separate….argh!) and that if I kept it up I would be throttled down. Nice try, no cigar.
So aside from having satellite at time via Dish, I went hunting for ways to improve WIFI reception when it is available. Oh man….. an overwhelming amount of solutions for that and it’s a bear trying to figure out what works and what doesn’t. After a lot of reading I settled on the King KS-1000 omni directional antenna with the WIFI Max Router. Without getting way into the how and what, as it is almost endless, what this setup does is place an antenna to receive campground WIFI in the best place possible for reception, which then feeds the signal to a router which creates a local WIFI network inside the coach for everyone to log on to.

The big question: Where to put it. First thing I did was establish that the signal from the router is quite powerful. (In fact devices in the house want to log on to it with it sitting in the driveway). So, anywhere was good. It had to be close to the antenna, with an easy feed through the roof or wall. After a lot of thinking I settled on….. the laundry closet. Right under the roof with no “furniture” in the way and out of sight:
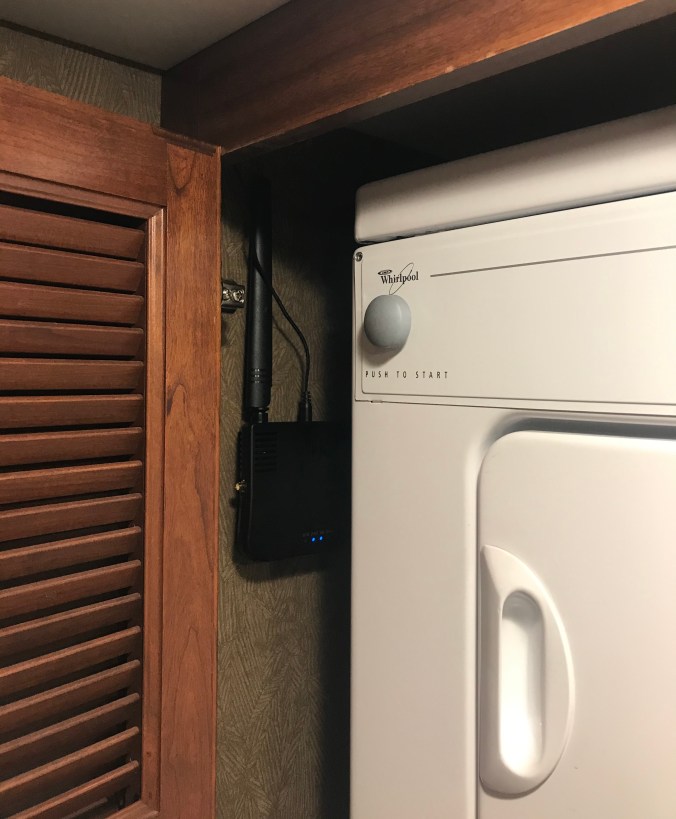
I ran an extension cord over top the closet and down into the sink cabinet. There are two outlets in there for the washer and dryer. I’ve plugged a power strip into the washer one, as it is relatively low draw anyways, and there I plug in the tooth brush charger, TPMS booster, a small lamp and now the router.
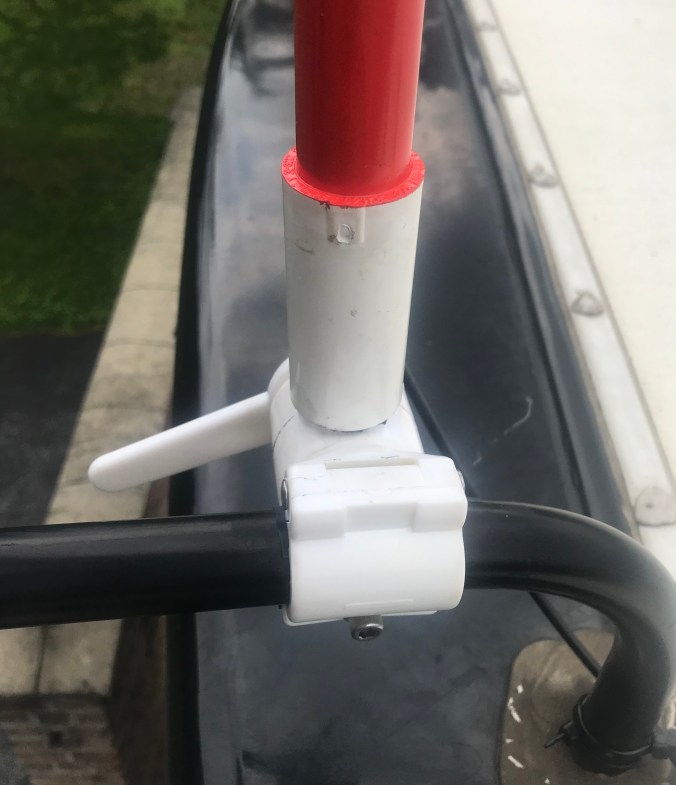
Next…. antenna placement. The KS-1000 comes with brackets to mount it in a variety of locations. But, the higher and the less obstructions the better the reception…. so UP we went. I got a marine antenna rail mount, then fabricated a “whip”. 3/4″ schedule 40 PVC with JB weld on to the swivel mount end, and then a 1/2″ PVC “bushing” milled down inside the other end, into which the antenna threaded. Through the roof into the laundry cabinet and bingo…. A nice little block for it to rest on when down. The rain hood on the bathroom vent should keep branches from grabbing it….. How does it work? Well, I still have to test it in the field, but right now I’m “seeing” about 15 networks and printers in the neighborhood and before I saw none…….