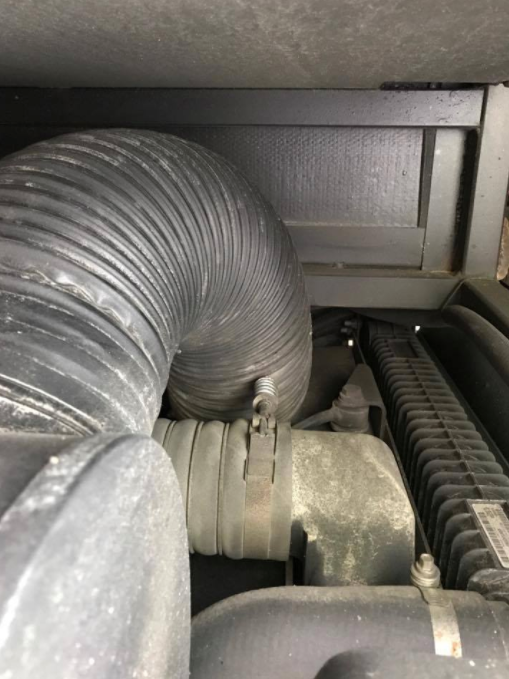
So one of the first times I was under there I noticed one of the clamps on the CAC? intake hose positioned in such a way that the round metal threaded rod was touching another hose…. It was only a matter of time before this would have chafed through….. loosened, turned 90º and done…
Before:
After:

____________________________________________________________________________________________
Replacing the Air Cleaner
Another job where you can save $$ not having someone else do it. Again, it’s as simple as doing it on a ’76 Chevy, just a little larger, and a tad more expensive! Get the EXACT model number and shop around. There are a lot of different ones and a lot of sources in a broad range of prices. Mine is rather rare….. (surprise) and I couldn’t find it other than from FCC in Gaffney, although I THINK Forest River is responsible for it….. Another one of those.
So, why do we care about the air cleaner? Once again, give a diesel clean fuel, air and get the dirt out (oil change) and it will run for a long, long time. Bad air supply wreaks all kind of havoc. Worse, if the paper in the filter cartridge shreds and goes into the engine you are talking a LOT of damage quickly. So, spend the money and keep this puppy ship shape.
And, once again, it looks harder than it is. In fact, the second time you do this you could do it in under 10 minutes. I took my time, and lubricated/cleaned. I also was able to see parts of the engine with the thing removed that you usually don’t see. Specifically the alternator and the pump below it (AC compressor I believe) and the serpentine belt and tension pulley. Really gave me a shot at inspecting all that. So….. here is what you see when you get under there:
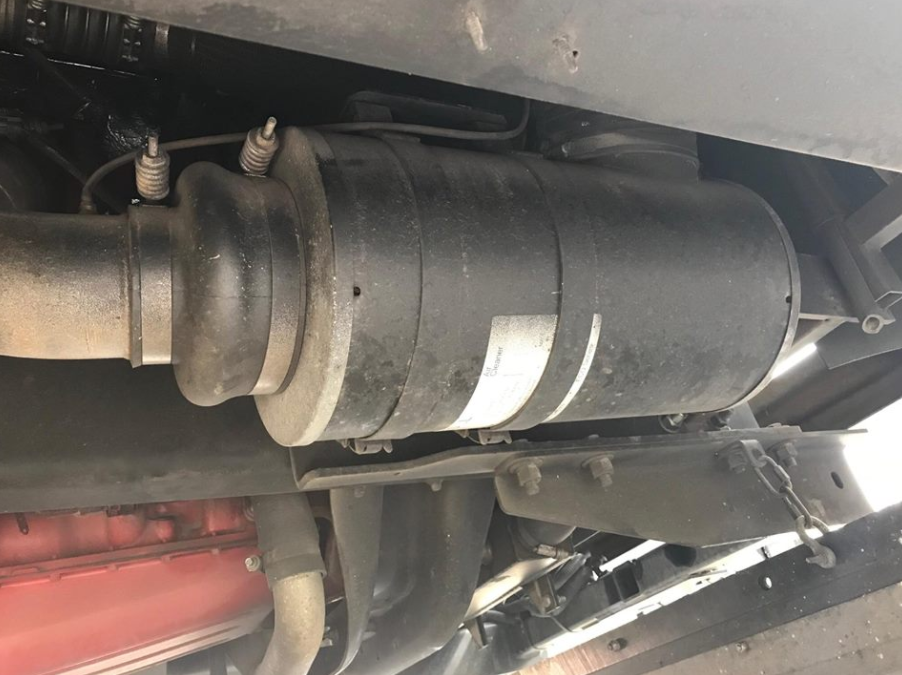
And initially I thought that it was a canister with a filter element in it which you have to change… nope…. you change the whole thing. There’s a hose clamp on top that secures the hose coming from the louvered inlet on the side of the coach, and there’s a hose clamp on the filter side of that rubber bellows on the left. Undo both and get them out of the way. Then you just unsnap the two quick release straps that hold the thing in place, a little wiggling and it drops right down. That’s it.
Here’s the view of what’s behind it once it’s out of the way……

And here’s the old one sitting next to the new one……..


New one even comes with instructions. So, I put some lube on the clamps so they would go back on nicely. I also wiped what dirt I saw in the pipe going to the engine. Lastly I lubed the flanges and hoses with silicone spray (as per the instructions) so it would go back together easily, which it did. Secure the clamps, snap the straps shut and that’s it. TIP: When you offer up the new filter hang it in the straps with the hooks on, but not snapped shut. It will hold it in place enough to get the hoses on, but it will still allow enough room to turn and position.
New filter in place….. Good for another 12000 miles/1 year. This is what the book says, and because of the importance of clean air, this is not something I plan to skimp on.

The part number….. For some odd reason this is a specially designed piece for FL and VERY hard to get….. Found mine through Gaffney, there is ONE other place I found that MAY have it……
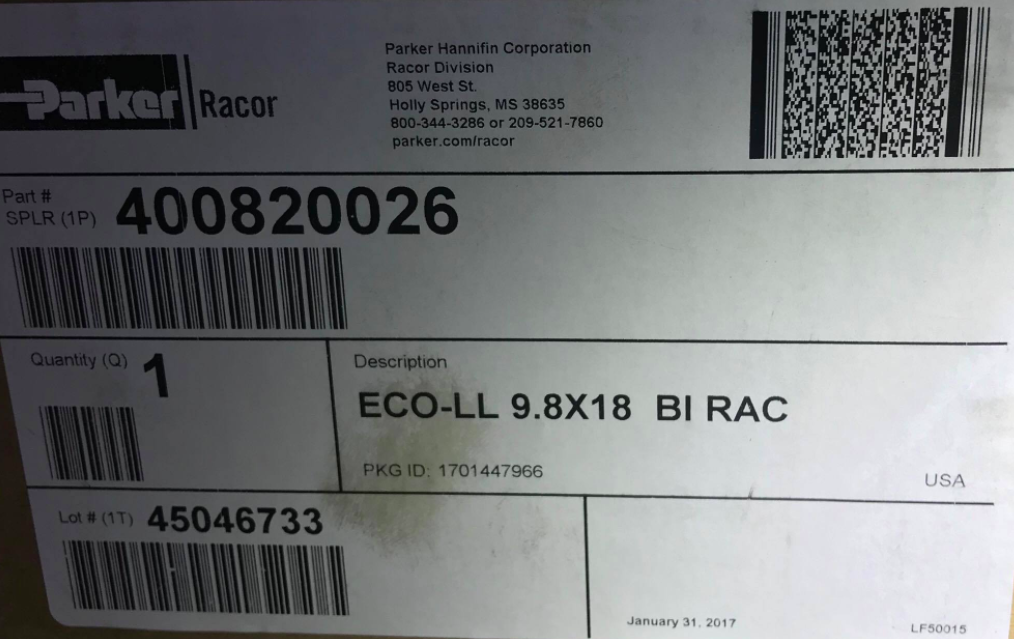
EDIT…. Found the next one at M&D distributors for a lot less and it fits just fine.
