Air conditioning maintenance is a matter of keeping them clean and running efficiently. If they run efficiently they have to run less to do their job and then, in theory, they will last longer. And, they may actually keep up when it’s toasty outside, and those of us with “only” two of them know that occasionally that can be a challenge.
First off, the inside filter. It’s easy to do. Remove the cover, wash and rinse. If you see dust on the outside cover around the openings, the filter is dirty and you’ve actually waited too long. Full time use once every two weeks is not overkill. Speaking of inside cover, current coaches come with a ducting only system. The register you see on the ceiling is the return. This is where the filter is. As an early 2017 (last of the steam coaches) I had the ceiling cover with the “dump vent”. It allows you to choose between sending the air to the ducting, or to have it all come out of the bottom. The cold air shower. Awesome if you just ran a half marathon. Problem is, it’s noisy. WHAT? So one of our fellow owners, Darrel Abst invented the RV AC silencer….. I installed one on my front unit and I’m liking it. The cold dump is the most cold air you can get out of the thing, and if you get into a hot coach nothing beats it. Ducted it takes a little longer, and it MAY be a hair less capacity. But, it’s quiet. Much more quiet. So I added the Magneshade which made up for it and then some. Keeping that massive greenhouse up there from heating up does wonders for keeping your coach cool…. It is a hair more work to clean the filter, as you have to take 4 screws out instead of just pinch and pull, but it’s worth it. But, it comes with a high tech filter which does a MUCH better job at catching the dirt. And, catching the dirt is important because it keeps the inside of the roof unit cleaner. So…..
Let’s get on the roof! And there it is…..
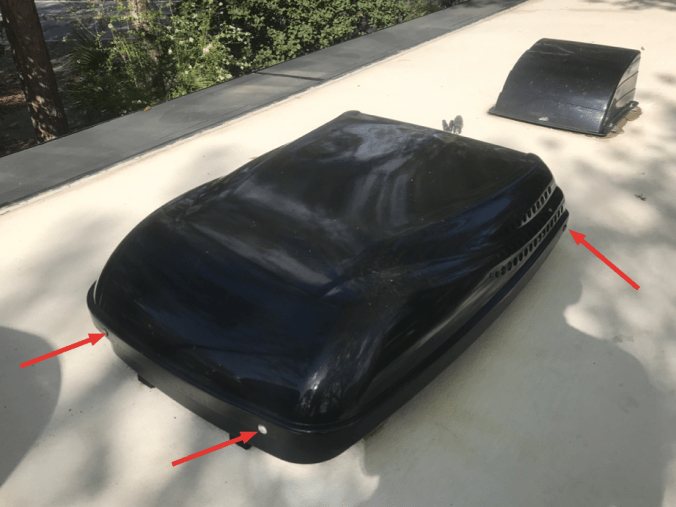
Remove the 4 screws (three shown) with a phillips screw driver. Lift off the cover and set aside. Don’t lose the screws. With a sharp knife carefully cut the foam strip where shown:
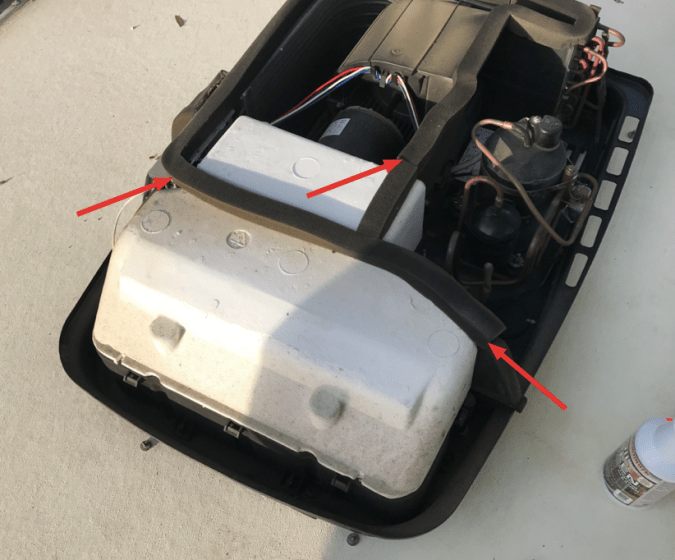
Gently lift the white styrofoam cover off and set aside. Now, remove 5 (or was it six?) 1/4″ drive hex head screws (some shown at red arrows) around the edge of the black plastic cover. There are tabs that hold the cover on as well (some shown at blue arrows), and there is a sticky blob you’ll have to pull away from around the refrigerant lines (green arrow). Gently remove the black plastic cover and set aside.

So here you have it….. DISCLAIMER…. I know JUST enough about air conditioning to be dangerous. So I’ll explain the basics of how this thing works, but by no means is that complete, and by no means do I know all of it. The compressor liquifies the refrigerant (a chemical liquid/gas) This heats up the refrigerant. It then sends it through the compressor cooling coil. The compressor cooling fan, driven by the motor, pulls outside air across it to cool it. (This is the noise you hear outside). The cooled liquid refrigerant then goes to the evaporator. The evaporator is housed in a space separated from the rest of the unit. (the black plastic box I removed). In the evaporator the refrigerant returns to a gaseous state which extracts heat from its surroundings. (Same principle as freezing your fingers in propane which evaporates.) This cooling effect makes the evaporator coil cold. The circulation fan, which is attached to the other end of the motor pulls air from inside the coach, sends it through the cold evaporator and then back into the coach as cold(er) air. Viola. Air conditioning.
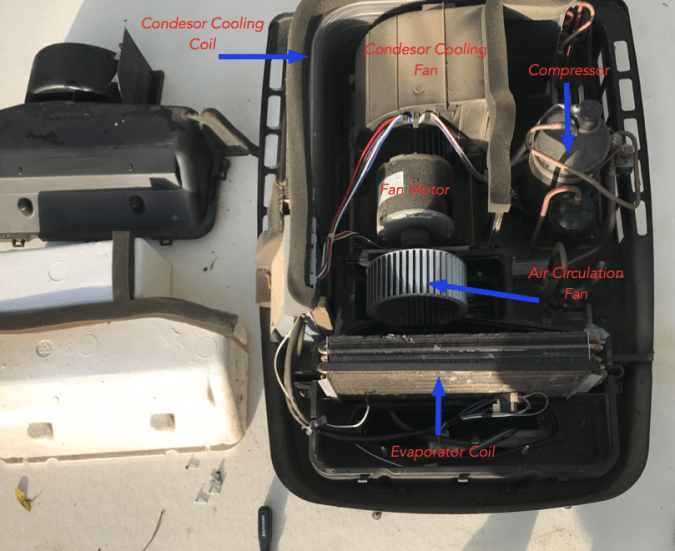
You will now see why the inside filter is important, as it keeps dirt from reaching the evaporator coil and reducing its efficiency. You will also see why it’s important to keep the condenser coil clean. The more efficiently it cools the refrigerant, the more heat it can absorb in the evaporator.
NOTE: Be VERY careful with the coils. Those hundreds of little fins bend easily. The force from the water out of a garden hose is more than enough to do a lot of damage. As you can see in the pics mine are pretty beat up, as well as the black cover not being installed quite properly. Since I hadn’t been up there yet and I bought the coach new……. Do the math. So, be careful.
So what do we do up here? First off, we’re looking for debris inside. Insect nest, leaves, birds nests, anything that doesn’t belong. Secondly we clean the coils. How often? Depends. I run my front A/C more than my aft. The aft was still pretty clean after three years the front not so much. The hardware store sells special stuff, lots of brands, here is one:

Now, the condenser coil is dry. So per the instructions squirt the stuff on there and let it sit for a few, then rinse. For rinsing I use a 1 gallon gardening sprayer. Low pressure and nice thin wand to get down in there. Repeat if necessary.

The evaporator coil is wet. When it gets cold there is a ton of condensation on there, more on that later. So, squirt the stuff on there, and when you’re done run the unit and it rinses itself.
Speaking of condensation…. On most RV’s it drains out of the bottom of the unit on to the roof and then down to whatever the lowest point is and then drips on the ground. One of the nice features of our coaches is that the condensate is collected and then runs down a tube inside the wall to the front (front A/C) and rear (rear A/C) left corners where it drips on the ground, away from the patio. Neat. BUT…. these tubes need to stay clean and we all know that water promotes growth, so these lines need to be cleaned or they will clog and then the little drain pan will overflow into your interior and that is BAD. The evaporator sits in a tray of sorts and at the ends you will see two drains…..(Not visible in the pic, but that’s the location) If you look down through the hole in front of the evaporator you will see the hoses. (Also not shown in pic…..) Btw, while you’re in the hole in front you will also see a phone cable, this is the connection to the thermostat (Just visible at the bottom of pic below). And, all this stuff is also visible from below when you remove the cover.

So how do we keep the drain line clean? There’s a pill for that!
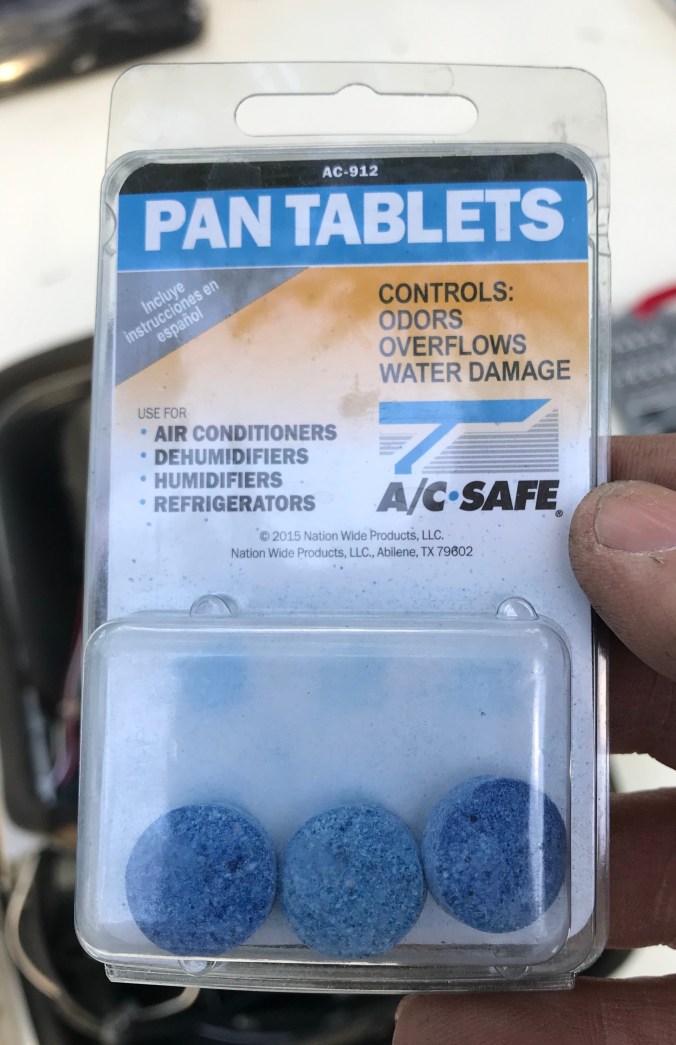
Two or more per 12,000 BTU, there’s six in a pack, two units…. three each…. makes sense.

And that’s it. Button the unit back up and you’re good to go for a year or two, depending on use and conditions. Again, my rear one was fine, but the front one needed it. It runs more, especially for a whole month every July/August in a location which can get pretty dusty. Here’s the before pic of the condenser coil. I forgot to take an after pic, but it was noticeably cleaner. You’ll have to take my word for it…..

