I HATE driveline vibrations. What most people would not notice, let alone find an irritant, drives me nuts. (My wife will tell you “it’s a short drive” 😉 ) If you don’t believe me I can refer you to a few Chevy service managers that are now permanently on prescription acid relief medication trying to smooth out my purchases under warrantee. That said, I have learned quite a bit about the science/art of keeping it smooth over the years, and most of my fleet does pretty well. I won’t hesitate to replace rotors or tires if necessary, and I have a shop nearby with a guy who actually knows how to computer balance a tire, and cares enough to pay attention.
On our motorhomes we’re talking a different game though. As we know this is a truck chassis, with truck wheels and my buddy can’t chuck up a 22.5″ inch wheel on his machine. Freightliner does a pretty good job though and for the first 2500 miles or so our rig was perfectly smooth. But, things don’t stay the same and I’ve developed a very slight shudder in the front end, barely noticeable, but it’s there. Did I mention I hate vibrations?
After a lot of research on the subject, including reading pages and pages on the commercial trucking forums, I realized that in order to keep it smooth I would have to balance the wheels on a regular basis. Of course this takes time and money. I could either drive it in and have them take the wheels off, spin them and put them back on…..and sit there and wait for whatever hours is takes, or I could take them off, load them on a trailer and take them over there. Either way it takes time. Don’t know what it would cost if they take them off, but if I carry them in, spinning a pair of steers would set me back $80 plus tax.
Then I came across the concept of “dynamic balancing”. Weights that spin with the wheels, but can move around the circle to find the spot where they counteract any vibration. They come in two versions. Version one is beads that go inside the tire. Based on tire size a certain number of beads is introduced into the tire either in a bag if the tire is off the wheel, or with a syringe type tool through the air valve. They require a filter inside the valve stem so they don’t clog it up. The second version is the Centramatic. Designed around the same principle it consists of a disc that mounts between the wheel and the hub, with a circular tube mounted on it’s edge in which loose weights, again, spin and find the spot where they make the vibration stop. Both have the advantage that, in theory, they do not only balance the wheel, but also the hub and brake assembly, ie everything that spins on that corner. And, they do it constantly, so that as things wear and change they compensate for that. The beads are cheaper, the Centramatics avoid “stuff” in the tire and once installed do not require anything when new tires are installed. Commercial trucking firms acknowledge the claim that tires last a lot longer and droves of drivers on the forums, both commercial and motor home, attested to the improved ride it brought them. So, for the cost of about two or three spin balances I went with the Centramatics.
Another advantage of this approach is that I didn’t have to take the motorhome or the wheels anywhere. I could do it all in my driveway. Below is a report on the installation. This may be of interest in general to some, as it describes a very doable procedure for removing and installing wheels on our units. In on line discussions, specifically the one where we were debating whether to carry a spare or not, it appeared quite a few owners are hesitant to tackle these large wheels. Turns out, it wasn’t too bad after all. Yes, it does require investing in some tools.
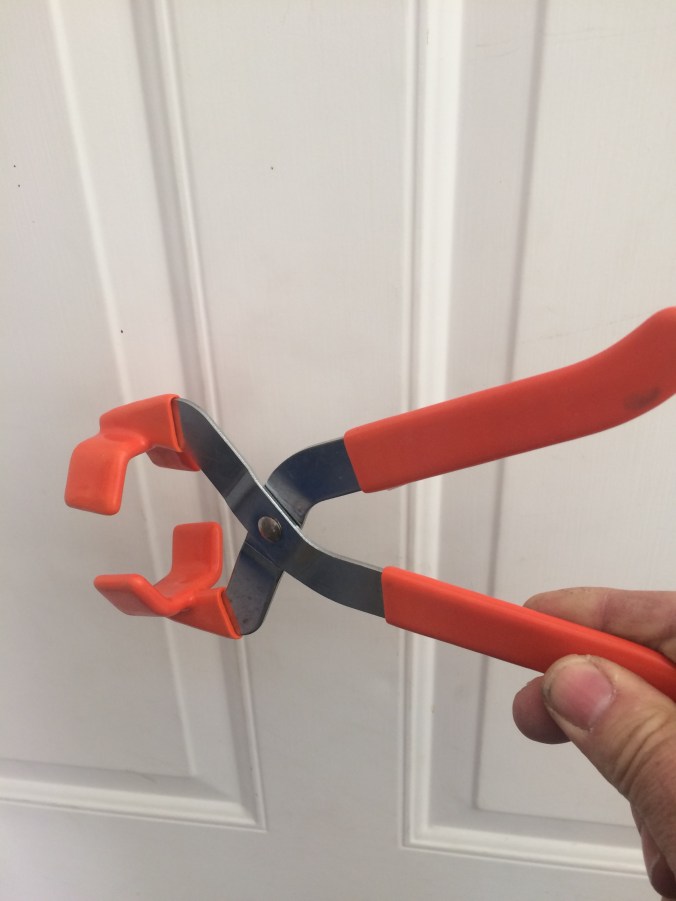
The first thing to come off are the chrome protectors on the lug nuts. Taking them off without deforming them is critical as they otherwise could possibly not stay on when reinstalled. Of course we don’t want to scratch them either. There’s a tool for this which retails on Amazon for a whopping $11.00 It’s called a “Heavy Duty Truck Wheel Lug Nut Cover Puller RM100” Grab the cover and gently wiggle/pull it off.

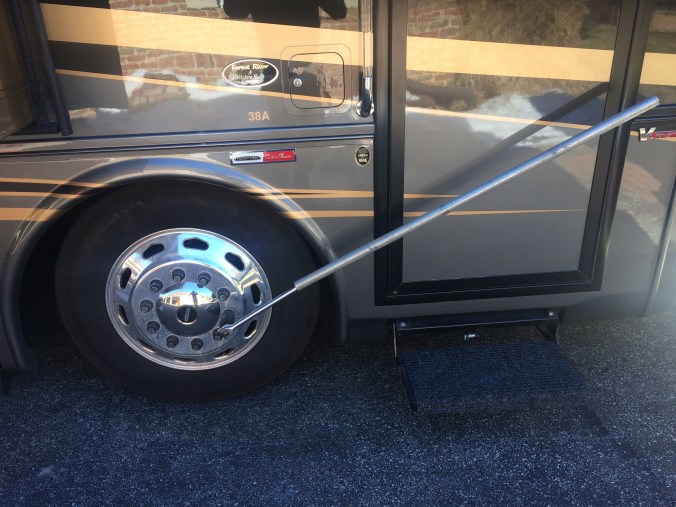
Now it’s time to loosen the lug nuts. On our bus the socket is 33mm or 1-5/16″. It takes a 3/4″ drive breaker bar (anything smaller will not survive) and in my case 4 feet of pipe on it. Physically speaking this is the hardest part. There are (probably older) references in the literature about the left side of the bus having left handed thread. Mine did NOT. Every lug nut was right handed.
Once the lug nuts were all loosened I raised the front of the coach about 6 inches using the leveling system to take a fair amount of weight off the front axle. I then used a 20 ton bottle jack under the axle to very easily lift the wheel JUST off the ground.

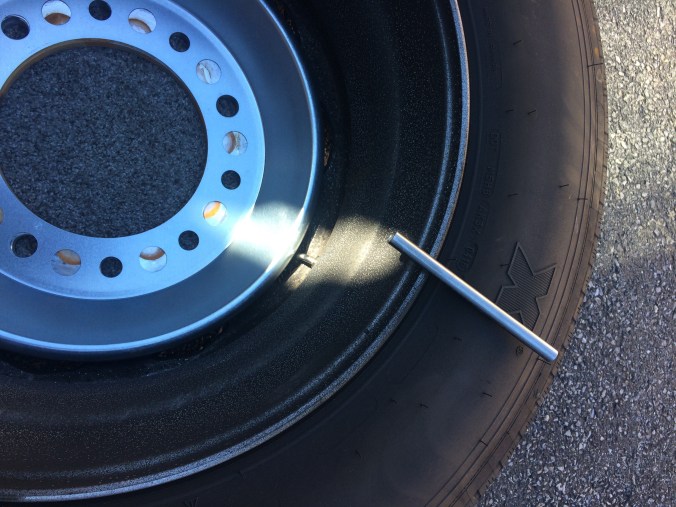
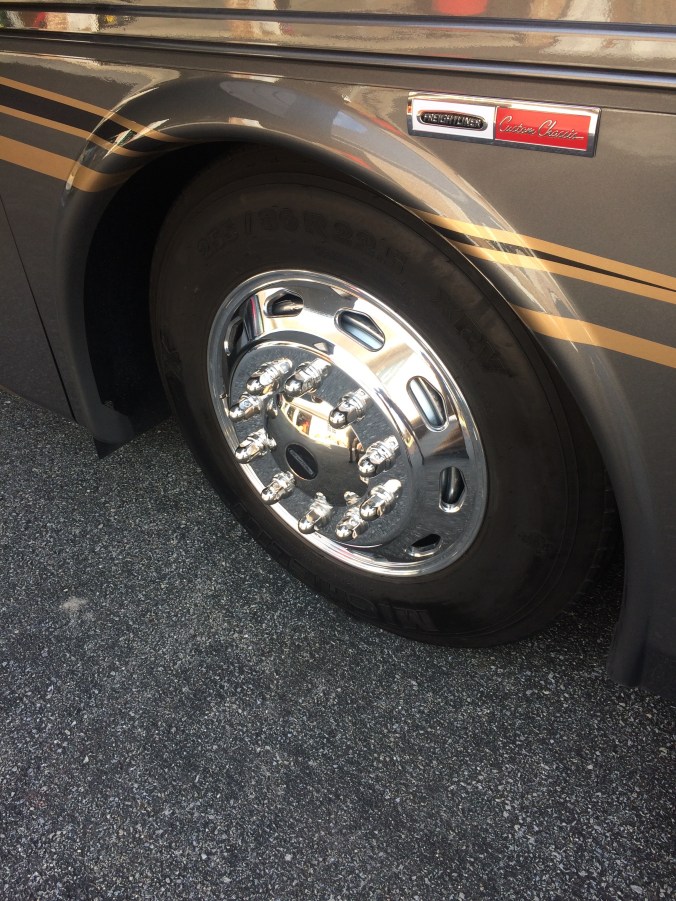
I then removed the lug nuts all the way. (After a few turns with the socket two fingers will take them the rest of the way as Freightliner was kind enough to put some lube on the studs!) Unlike most automobile wheels the wheel is not centered by the lug nuts. Those are flat and in stead of a conic end like on a car have a washer incorporated in them. Their only function is to pull the wheel onto the hub. Centering takes place through five large tabs on the hub that fit into the large hole in the center of the wheel. The holes in the wheel that the studs pass through are fairly large. So, with the wheel JUST off the ground it is possible to wiggle the wheel off the tabs and towards you without any contact between the studs and the wheel thus avoiding damaging the threads.
I now laid the wheel outside facing down on a piece of carpeting and fitted the Centramatic disc inside of it. Per the instruction it is important that the valve stem does not touch the disc. A small tube tool is provided to gently bend the valve stem a little out of the way if needed.
I then fitted the Centramatic disc on the hub. You can see the five large tabs that center the wheel on the hub. The Centramatic has 10 large and ten small holes. Per the instructions I used the small holes as it is a hub centered wheel.

Of course with the wheel off it was the perfect time to give it a polish with all the lug nuts out of the way. You can’t go wrong with Mothers and their aluminum wheel polish is no exception.

It was now time to refit the wheel. The bottle jack had bled down a little, but with a few pumps it was back where it needed to be and I was able to gently wiggle the wheel on to the hub with relatively little effort. And for those inquiring minds…… about 150 pounds.

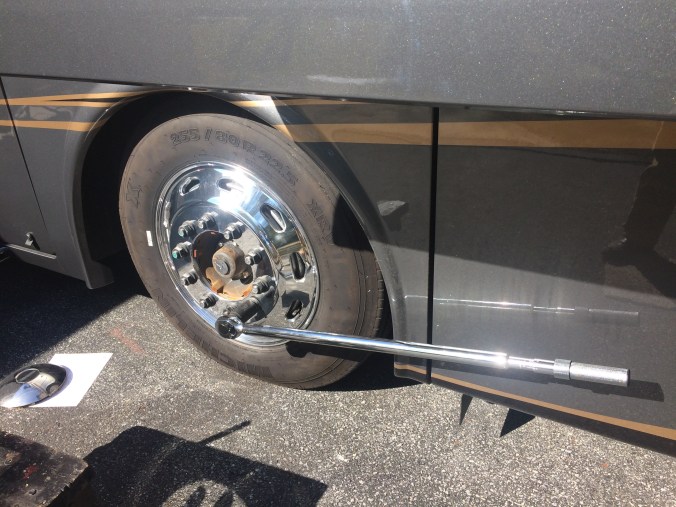
With the wheel and lug nuts back on the last thing was to torque the nuts. 450 foot pounds is the number the book calls for. This requires a substantial torque wrench. I got mine at Northern Tool, $270.00 It’s good to 600 ft/lbs. Yes, that’s an investment. But, I never mind buying tools as they increase my independence. The more I can do myself the less I have to deal with other people. I always check torque when I get a vehicle back from “the professionals” and more than once they just rammed it home with an impact wrench and didn’t bother to use a torque wrench. Do it this way and things WILL warp and then….. vibrate. Did I mention I HATE vibrations? The maintenance book contains tightening patterns for 6,8 and 10 stud wheels.
After that I polished the center cap and the lug nut caps and put them back on. The book calls for a torque check after 100 miles. (How do you do that if the shop did it for you and you don’t have a torque wrench????)
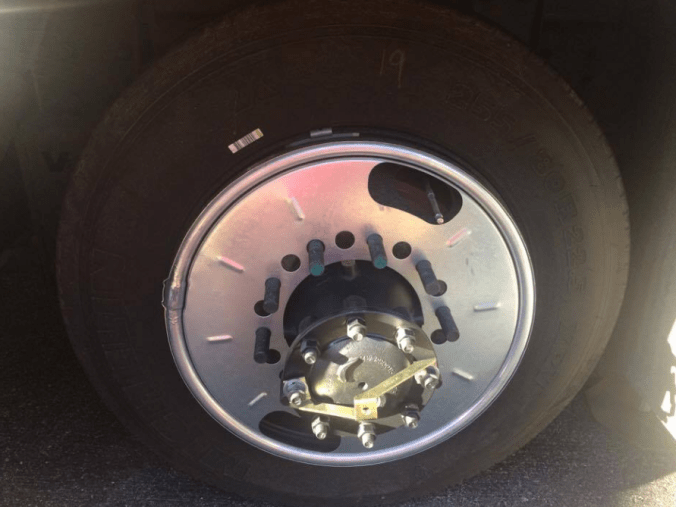
I also got a set for the rear. The process is similar with a few small differences. In addition tot the lug nut covers the big center cover over the hub has to come off. You have to remove the big nut in the center which has “stops” until it gets loose enough. THE LEFT SIDE ONE IS LEFT HANDED THREAD! Tighty lefty loosy righty……

I needed an extension on the socket to get in the wheel. When moving the wheel around take care not to booger up the valve stem for the inboard wheel. The disc can go on either way and there is a big opening for the aforementioned valve stem.
Once again I took advantage of them being off to polish them and then remounted them.
After Road testing them for 650 miles, I can tell you THEY WORK! IN fact the only time I wasn’t happy was when we had seriously crappy road conditions (I-95 in SC) and they came out of there all dizzy and things were not smooth….. 5 miles later they were. I am very happy with them.
20K update….. Either I’ve started (without thinking about it) ignoring whatever vibrations are there, or the thing has been riding pretty smooth. Actually, it HAS been riding pretty nicely. So, I’m happy. Is it thanks to the Centramatics? Who knows…. probably. For the money I’d put them on again.
