So as mentioned in a few places we escape the cold of the North East several times every spring and head for sunny Southern states. But, we do have to live in the coach while we travel, and sometimes it takes several hundreds of miles to get out of the polar conditions. Elsewhere I have addressed what I do to keep the plumbing from freezing, but more importantly I need to keep the people from freezing, specifically while driving.
The business end of the coach is taken care of. The dash heat is quite adequate, and especially with the cockpit curtains closed I can control it just fine. I can’t say the same for the cabin. The dash heat will not keep it warm. (even without the curtain as originally delivered new). Now, if there’s just two of us we can have the curtain closed and my bride can be up front and warm. When we pull over we crank the furnace and the cabin quickly heats up. But sometimes she wants to sit in the back, and sometimes there are three of us and one or two people and a puppy sit in the back.
Some furnaces will run when driving, ours will not. I suspect the airflow around the intake/exhaust area is such that it blows out and cannot restart. After three tries it gives up. So, the alternative is electrical heat. The heat pump does quite well, and the noise is not an issue while driving. But, at about 40ºF it starts losing effectiveness, not far below that it gives up (and is programmed to do so). The fireplace works well, but 1500W is not enough to keep it warm back there when the temps are at freezing or below. And, both these require the generator to run, which I have no problem with, but it would be nice not to have to.
I must say this is a serious shortcoming, right up there with the hot water failure. A bus this price level and there’s no way to keep it warm when driving in cold weather? I mean come on….Note: Coaches are increasingly being equipped with the Aquahot system which WILL keep the coach warm when driving, and depending on configuration with or without generator running.
Sooooo, in the search for solutions I found one very elegant one in, out of all places, the school bus world. The dash heat is a simple radiator through which hot water runs, with a fan blowing over it to extract the heat and warm the air. Ducting and baffles direct the hot air to where we want it. The hot water comes from the cooling system of the main engine. There’s a supply hose and a return hose that run all the way from the engine to the front of the coach and back. In fact there are two shutoff valves in the loop by the engine which are mentioned on the radiator fill procedure on the sticker in your back engine bay. You can tap into this hot water loop! In fact that’s how auxiliary heaters in school and other buses work, as well as the auxiliary heaters in Suburbans and larger vans.
So….. after much measuring and figuring I ordered this:


About as simple as it gets. Small radiator, two hose connections and some 12V for the fans. Some of you may remember finding the seat on the school bus that had this thing under it…..
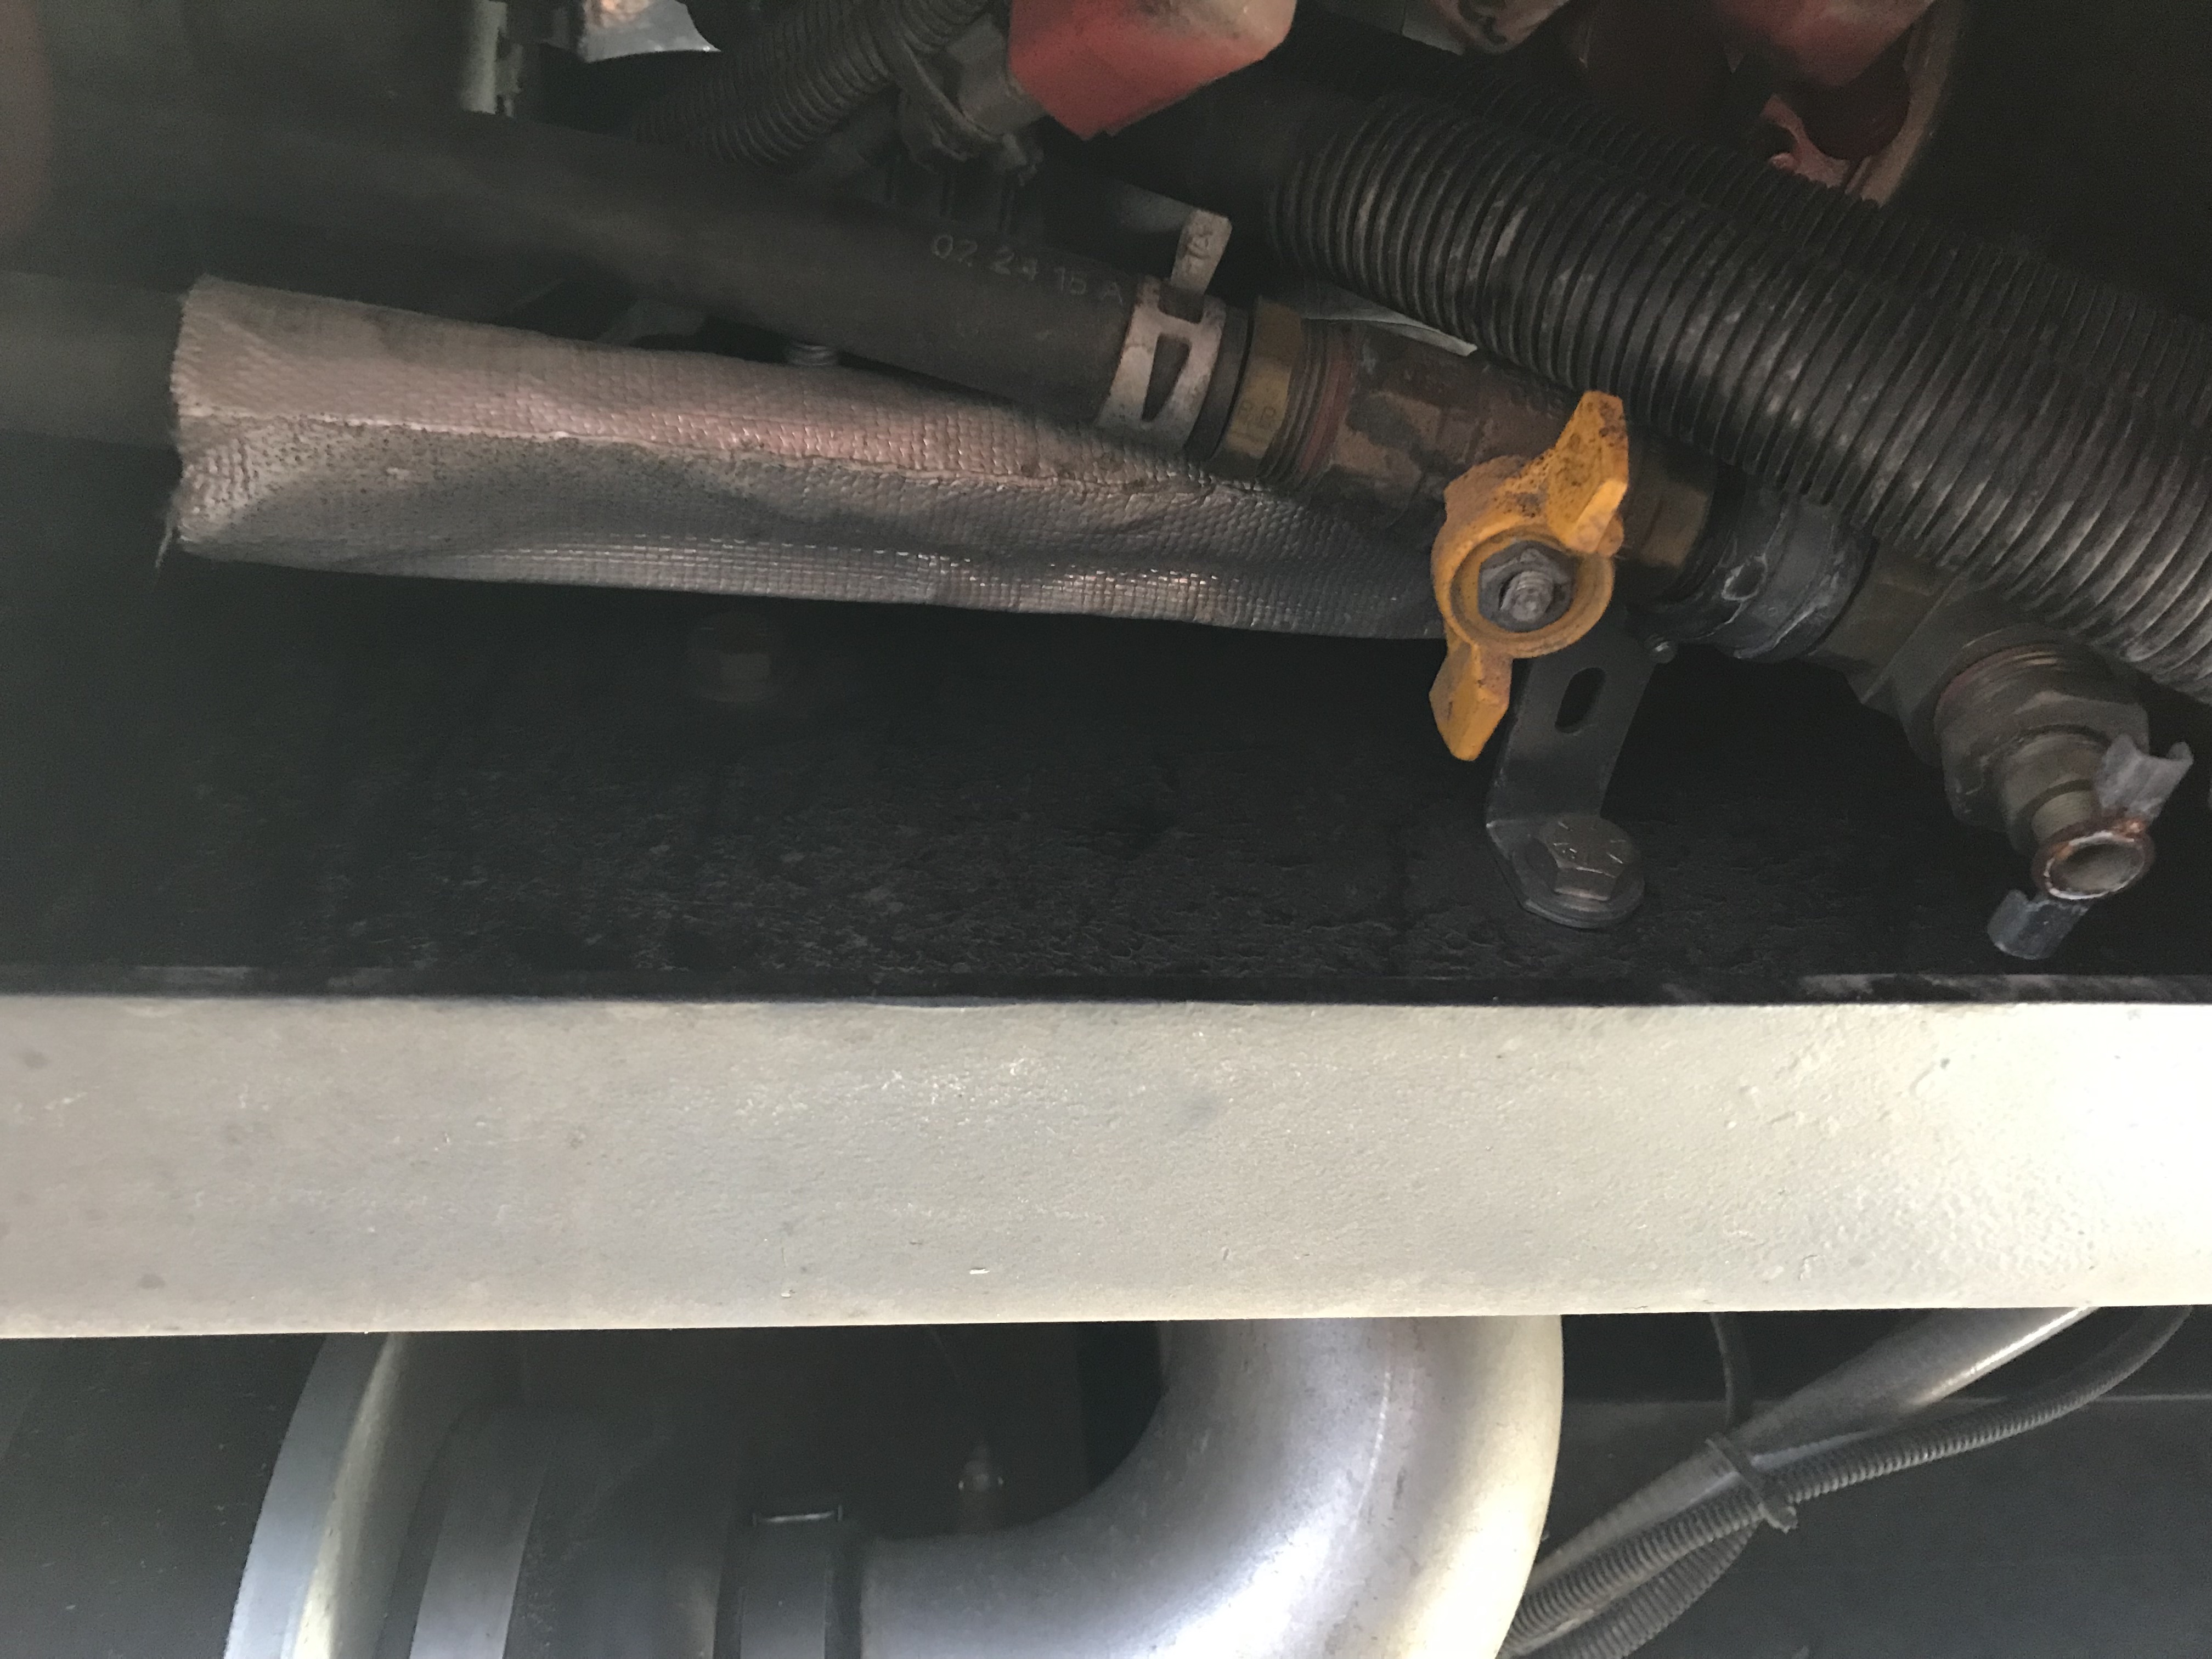
So, where are these hoses? Warning…. high risk of very dirty hands and arms, bruises and cuts. I am increasingly learning that getting to many things on the engine is tough, very tough. But, I had a starting point. I got under there and I found the two valves that looked like they could be in the heater hoses.
The first one is on the left side about a foot and a half in front of the radiator on the inside of the frame rail. The hose comes out of the bottom of the block, so that’s coolant. The silver tubing you see in the bottom of the picture is the air cleaner. (Notice theres’s a drain next to the valve.)
The next one was hiding a little better, but I did find it. Look waaay up between your two fuel filters:

Now…. to find a place where I could tap in, preferably close to where I could install the heater upstairs in a good location and get to it. Long story short…. the bed box. Plenty of space to mount it, and two holes down through the floor would lead to the area right above the axle, which is somewhat clear and unobstructed. It’s also the place where all hoses and wires that go forward come together into two bundles, left and right side, and go into two plastic channels in the frame rails that run to the front of the bus. (The next compartment forward is the wet bay.)
So, now to figure out which hose is which. (This is where the cuts and bruises come in.) Since you can’t see much you have to feel your way over the transmission and around the engine to follow the hoses. And there’s a curve ball, as you find too many hoses….. Until you realize that two of them are the DEF heater. (Internal to the tank). So, there’s two supply connections on top of the engine.

One runs down the right side (left in the picture) to the DEF tank and then back OVER the tranny down the left side back to the bottom of the engine on the aft end. The other runs down the right side to the valve (above the fuel filters) then forward, over the transmission, and then forward into the left channel. The one from the left side to the valve runs forward and then meets it’s buddy and also goes into the left channel. So….. I was pretty sure I had the two heater hoses in a spot where I could easily tap in, and run up to the bed box. But I had to be sure. Also, I wanted to know for sure which one was supply and which one was return as I wanted the heater in the return and keep the hottest water for the cockpit to defrost etc. So I started the engine, and ran it until the air out of the cockpit heater got warm. Then I shut it down and felt the two hoses I had identified. BINGO. What I thought was the supply and return were indeed warm, the supply warmer than the return. The red tape is on the supply. The return is right behind it not visible in the picture. The air bag is the left rear suspension, you can see the left rear shock, the axle at the bottom and the back of the inside left rear wheel.

WARNING: There are two hoses that look JUST like coolant hoses that go into the right side channel. If you follow them aft you come to the power steering pump on the right bottom of the aft end of the engine. Needless to say you do NOT want to cut into these.
Then it was a matter of splicing in. I cut the return line (YEAH, coolant coming out….) and made a pretty splice with shutoffs and a bypass. The reason for this is that when it’s in the 90’s and you’re fighting to keep the bus cool you do NOT want a 220º metal box under your bed. And, if it ever springs a leak I can also bypass it. BTW the two “Y’s” came with the heater. All hose is 5/8″. Valves are 1/2″ pipe, with 1/2″ pipe to 5/8″ barb connectors. Home Depot or Lowe’s….

After that it was a matter of two holes in the floor and up into the bed box.

And here it is, installed in the bed box. Some scrap pieces of wood to keep it in position. The astute observer will note there’s a duct there from the furnace to the most aft floor register. I tried to avoid it but it made life down below difficult as I would run into the frame rails. Going beyond that added different problems, as in bending the hose too much and risking kinks. So…. through the duct I went. There’s two layers of thin metal that make up the duct. I used a round file and made them as smooth as possible. I don’t think it will affect the hoses, but I’ll keep an eye on it. After all, what’s the alternative… a rubber grommet?

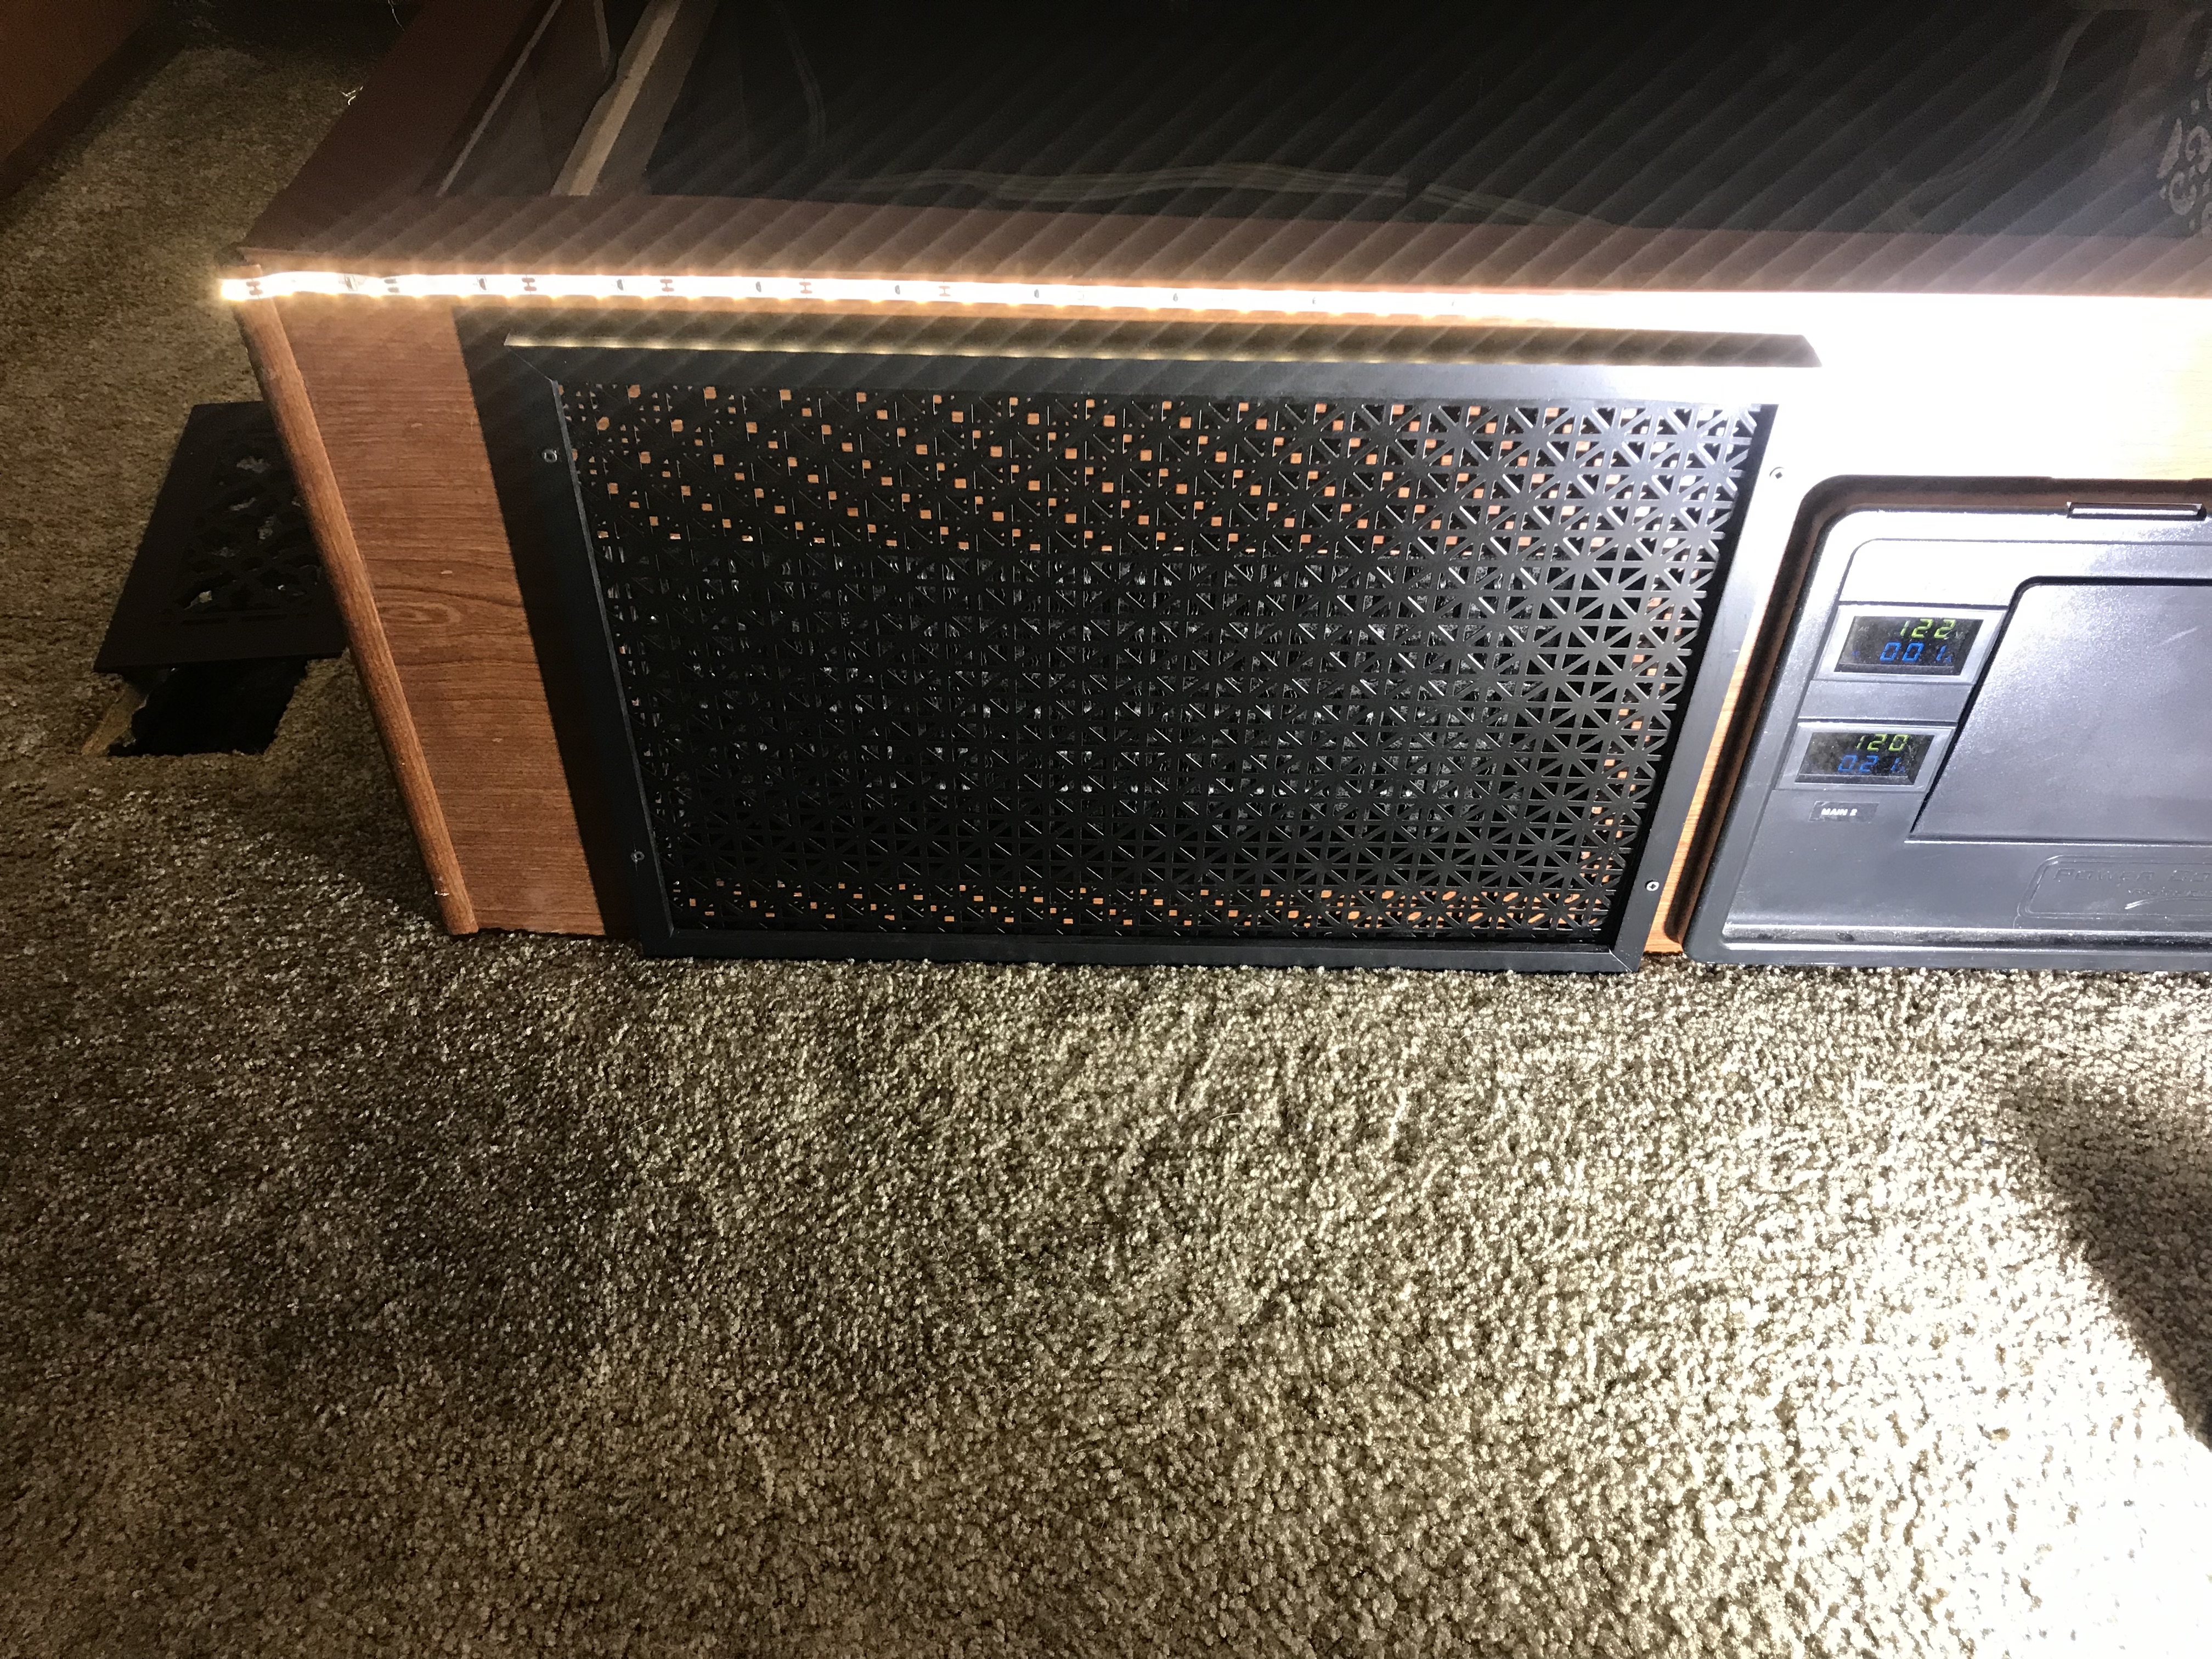
And the cutout in the front… needs a nice decorative grate of course. Looking around on the web, the grates are pretty $$$. Since it is barely visible to begin with under the bed platform I ordered a picture frame and some metal mesh on Amazon and made my own grate. (Note the two 120 Volt/Ammeters to the right…. this mod is discussed HERE)
And of course it needs a return…..this one with grate from Amazon.

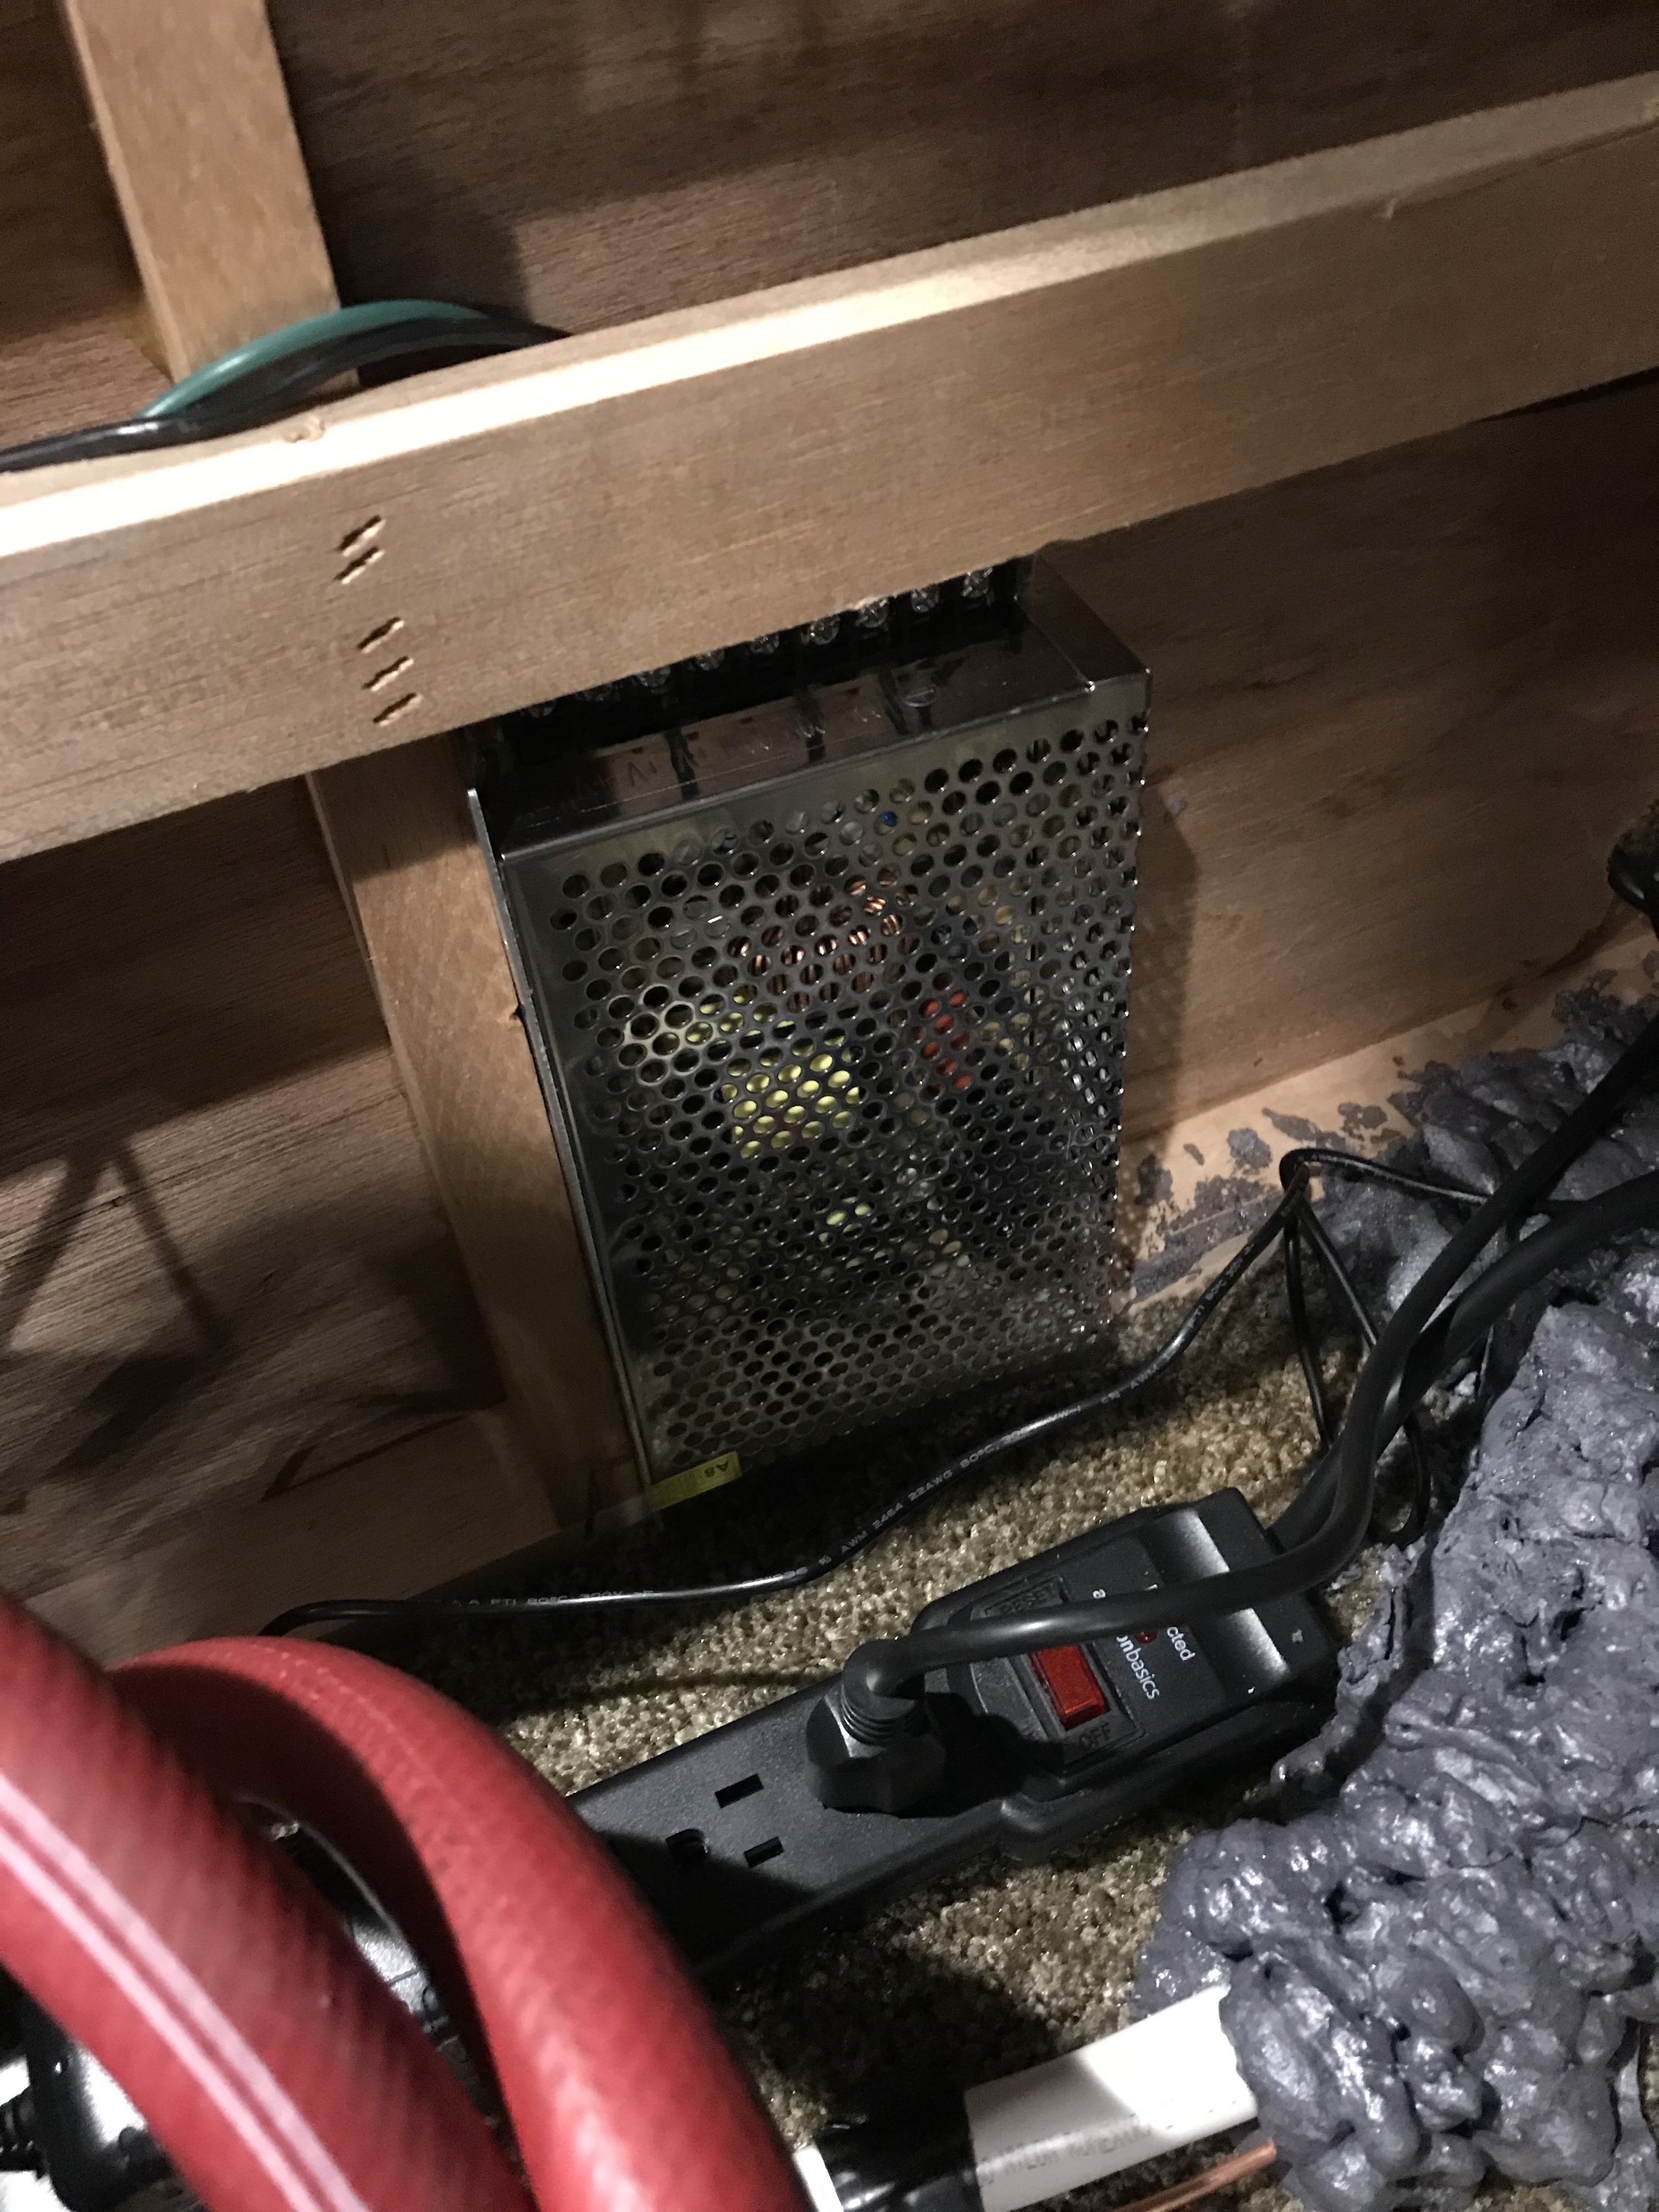
Lastly the thing needed 12V for the fan, and a spot for the fan switch. There’s 12 volt below the floor, but they are main lines. I could try and work my way over to the electrical bays on the left rear of the bus, but that would involve running through the engine part, shielding, and then creating additional clutter in the battery cabinet, a fuse block under the bed….. I didn’t feel like it and took the easy way out…. A 20A power supply. Yes, this requires the inverter to be on while driving but that needs to be on anyways to power the fridge so…. Maybe I’ll change my mind later but we’ll see. I also put a power strip under the bed with a plug sized hole in the side so I can get the power for the under bed lighting off the floor.
A little “touchy the wires to test” and the fans run. Holy cow… these things are school bus noisy. Should be a little better with the bed lid closed, and of course they will only run when the engine is running, so who cares. What remains was switching. The switch that came with the heater had a hi-lo, but that was an either or. No idea how to wire that so one or two fans would come on…. So I decided to use a regular wall switches. Had to be able to get to that with the slides retracted so I put it on the forward facing side of the bed box. Used dark brown. Looks OK. (Note the upgraded furnace heat register.) (Picture taken before return grate install, so predates pic above…..)

So here it is…… all installed:

And then….. the moment of truth! Fire up the engine and see what it does. I did a lot of reading, mostly on school bus maintenance fora out of all places, and found a lot of discussion on water boost pumps. Keeping the hot water flowing through the loop with the added radiator can be a challenge in some vehicles, especially at idle. So, there are electric boost pumps you can put in the line. (Hey, guess what, already have a 12V supply for that…..) and many school buses come with them. Consensus seemed to be that they didn’t do much, other than when idling which I do for minutes not more, and when they broke or leaked many operators were removing them without consequence. It was especially noted that vehicles with the Cummins engines didn’t seem to need them as the water pump is quite adequate…. here’s hoping.
Well…..preliminary test results are in. I think I can safely say in the most scientific of terms that this thing KICKS ASS.
Ambient temperature 35ºF. Cabin temperature 48ºF. Engine heater on for last 12 hours, so block on average at about 55º. Started engine and engaged high idle. (1200 RPM)
After 35 minutes (!!!!) engine at 145º. Air out of dash heat 110º, air out of cabin heater about 105º. Raised the cabin temp by 10ºF in that period. Engine temp stopped climbing (there’s another discussion there) so I stopped the test. I will write final results after I get on the road for a while.
Total cost: Under $450
So…. we hit the road. I did put a fan on the floor so it would blow towards the salon…

And for the final word: Outside 33ºF After about 100 miles the word from the cabin was: “We’re getting hot here, how do you turn this down?”
‘Nuff said.
UPDATE: January 2021
