As I have said in many places, clean fuel is one of those “must have” items for your engine to run happily and for ever. So understanding and maintaining the fuel filtration system is key.
On our 38A fuel starts at the tank, and then runs all the way back to the passenger side of the engine where it enters the Primary Fuel Filter and Water Separator. Made by Alliance Truck Parts (part of Freightliner and who have amazingly little info on their site). Here is a picture of it on the left. This is NOT my setup, but I use this picture because it shows it all more clearly than I can photograph on our unit. (Picture borrowed from Dutch Star Don) The Red disc on top is a dust cover over a push button primer pump. (More on that later).

On the bottom of it is a plastic bowl. Here you can SEE if there is water or serious debris that has entered the filter/separator. There is a drain to remove any water, and a sensor which will trigger a “water in fuel” warning on the LBCU. Somewhere some operational checklist has you checking the bowl each day, and after each fueling. Once again, we’re not running crappy fuel in and oil field in Whoknowswhereistan. Then again, it only takes one bad batch from that cheap gas station in that little town along our way……
After the Primary Filter/Water Separator the fuel runs to the primary or low pressure fuel pump on the engine. From there it goes to the Secondary filter, the one on the right in the picture above. (Again, not my setup). After that it goes to the High Pressure or Injection pump. The Primary Filter is FCC, the Secondary is Cummins.
Here the pic of the actual setup on the 38A. The primary is “up there” a little, the secondary is very accessible…. You can just see the red dust cap on the primer pump at the top of the primary. Note the drain and the single sensor wire on the bowl, some models have two. Also note the small red filter behind the fuel filters. This is the external transmission control filter which was changed at 6000 miles per Allison. Note the secondary filter is red, as in painted when new with the engine by Cummins, just like the oil filter. The primary filter has black overspray compliments of Freightliner.

How fine filters are is expressed in Microns. The primary is less fine than the secondary and catches “big” stuff and water. How fine? No idea, I’m having a heck of a time finding data on it. My guess is around 10 Micron. The secondary filter is finer, most likely around 2 micron.
So, what gets replaced? The yellow metal canister on the primary (in my case p/n N122-R50419 from Alliance, which is Freightliner’s private filter label….) and the black canister on the secondary filter.
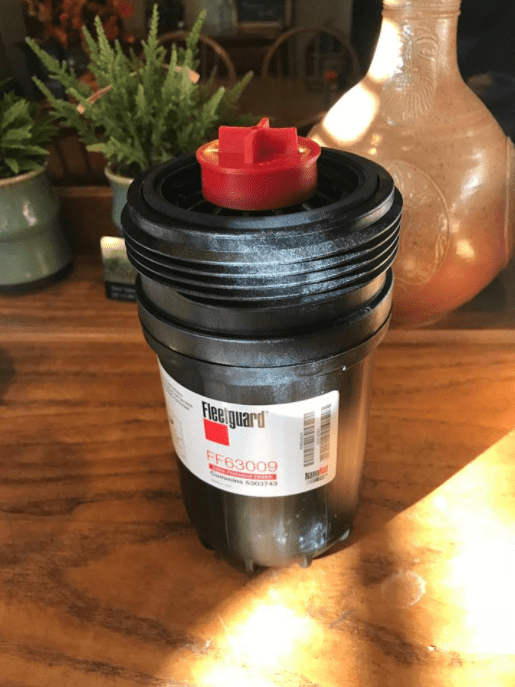
Searching for these parts is dizzying to say the least. There are many types of filters, and several manufacturers making filters to fit their competitor’s. Cross referencing you can get lost very easily… Then there are piles of forum pages where people advise on which filter can be used where….. it never ends. In the end I’m sticking with what Freightliner put on there and got my first one through Gaffney….. (The Oasis Dealership considered the “Factory Service Center”.) The secondary Cummins filter is a Fleetguard FF63009, straightforward and available all over the place.

So…..now it gets interesting. The HOW.
It is very important to know that unlike gas engines, diesel engines have a very hard time getting rid of air in their fuel systems. In fact it doesn’t take much for air to prevent the engine from starting. On top of that, a lot of air coming through the injection pump can damage injectors. (KACHING!) So HOW you replace things matters in keeping the air out.
After some reading of writing by people I consider reliable sources the first issue is that when you remove the primary filter cartridge fuel keeps flowing out, assuming the fuel in the tank is above this level, which in our case it is. If it is BELOW this level, fuel will run back to the tank and you now have 30 feet of air in the fuel line….. This would require a lot of bleeding, but I don’t think we will need to as I think the tank is above us. so leak (on me) it will.
So, the straightforward procedure is to disconnect the water sensor, unscrew the canister then the plastic bowl on the bottom of the canister is removed and goes on to the new canister. O-rings between the bowl/canister and canister/mount need to be lubricated (see instructions on the canister). Then the new assembly goes back on. All during this operation fuel will be coming out, no idea how much. The whole idea sounds messy.
Some people recommend getting a second plastic bowl so you can have the new canister ready to go and minimize the raining of the diesel….. Sounds like a good idea. Then there’s an even more elegant solution and that’s to put a ball valve in the fuel line where it enters the filter so you can shut off the fuel line. No leaking fuel, no air going in the line…. and plenty of time to do things right. Not even talking about having to do this on the road after some bad fuel and not having all the gear to catch/clean things up. I’ve read that the more upscale Moho’s have this shutoff standard when new…….Hmmmmmm…….
So, back under there we go and after peeling back the plastic protective tubing on the fuel supply line (the brown plastic tubing going in to the primary filter) we discover that we have Parker diesel fuel tubing, 5/8″ OD…..
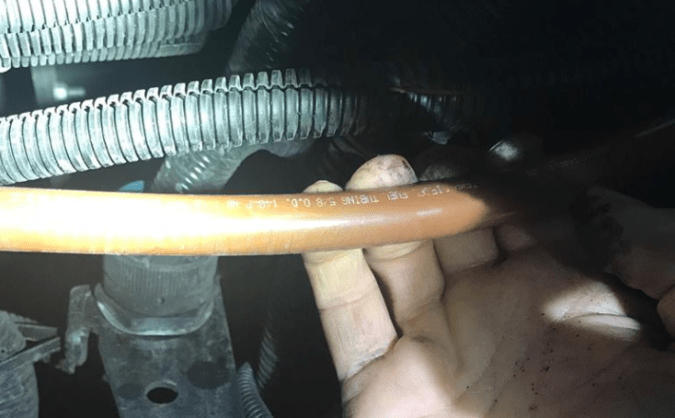
The folks at Parker were surprisingly accessible, although it is a complex company. The PARFLEX division told me that the tubing is compatible only with NTA® fittings…..Those are for air brakes…. After briefly scratching my head here I thought well, if it’s good for 120 PSI and made out of brass which is perfectly compatible with diesel…..OK. So, I then went over to the Parker Fluid Division where another nice lady said they do not have a ball valve, but they do have the NTA® fittings that go to NPT…. (National Pipe Taper, yup, what we all know as “pipe thread”) So she sent me a page of their catalogue where I found a 5/8 NTA® to 1/2″ NPT and for giggles I asked Amazon…. well guess what…..

One question to ask is inside diameters. Well, it turns out the fuel tubing is .441 inside, and the fitting is .398 That’s a 10% reduction. I don’t think it will matter, but something to file in the “just in case” department. As an aside…. this looks suspiciously like what they used to connect the fuel line to the filter/separator, so we are on the right track here. For the ball valve I ordered this one. It says gas, but the description adds that it’s WOG…. Water Oil Gas. The yellow handle is a good color for Diesel use.


Now for the installation. The next step was to insert the fittings into the valve. They come with sealant on them, very handy. There’s a $10 tool for cutting plastic pipe. I got one a long time ago for cutting PEX water pipe. So…. this was the moment. I put a plastic tub under there, cut the line, minimized the leaking with my finger, and got the collar then valve on there (with the valve in the closed position) and tightened it down. Total fuel leaked about a cup and a half. Then I cut the remaining piece of tube to the filter down to length and inserted into the other fitting. Tighten it all down, and viola, a fuel shutoff. Up to the right in the second picture.


After this it was easy. Closed the fuel shutoff and opened the drain on the primary filter/water separator. Then using a rubber strap wrench I loosened it. Once air was able to get in it emptied into the tub. Then I removed it and I made sure the gasket came off with it. Clamped the disposable part into the bench vise and removed the bowl with the rubber strap wrench. Put the bowl with it’s gasket on the new filter and filled it with fuel.
Yes, another controversial subject. To fill or not to fill, and how. Some manufacturers say no, some people say no. Some say yes. With the Cummins filter the answer is easy, it was in the instructions. The primary had no instructions. And, there is that primer pump on the top….. Well, I filled it. I had fresh, fuel and poured it in a dishwasher clean plastic yoghurt tub. I could SEE that is was clean. And I poured it in. Tried to pour it in the “dirty” side (outside ring of little holes) but it wasn’t going anywhere. So I poured it in the center. Again, clean fuel, and it was still going to go through the secondary so I wasn’t worried. Oiled the gasket and screwed it in place. Nice and tight with bare hands. Has worked for me forever. Opened the valve, gave the primer pump a few pumps, it got hard in 5 pumps, and started it up. Fired it up and it ran like a champ. Not a hickup.
NOTE…. it is recommended to fire it up between the two filter changes to get rid of any air as much as possible in little batches as quickly as possible.
So, on to the primary Cummins filter. 25mm socket fits on the bottom, and off it came. The new one came with instructions to pre-fill it. In fact, it comes with a nice red cap to block the clean side and yes, it takes fuel on the dirty side quite nicely.
Again, oil the gasket and on it went. Torque per the instructions (25ftlb IIRC). Open the shutoff, give the primer pump about 4-5 until resistance and fired it up. Started and ran like a charm.
There, that was easy.
