This is not really a mod as I put it together just like it came out of the factory, or more correctly SHOULD have come out of the factory. The meth head that put the vinyl on the door tried to do it with a piece that was too small and stretched the you know what out of it to just get it done. Of course with just contact type cement and no mechanical fasteners that isn’t going to stay so over time things returned to their natural state……


It was like this sitting on the lot at the dealer. Now, with the screen door open and attached to the door it was hard to notice….. but I did. Rather than bring it back to them, have it sit on their lot for two weeks (or more) waiting for them to get to it I coerced them to send me the parts and call it a day. They received the parts and then sent them to me. I suspect they billed FR for work not done.
So, I threw it in the basement and on a beautiful day at Disney’s Fort Wilderness with the crew in the parks, just me and the dog, got busy. First thing is to strip all the bits and pieces. The plastic trim around the edge just jams in there and sort of spring loads itself in place. Removing it is a matter of prying with screw drivers and pulling on it with pliers. It is somewhat brittle and did not come out in one piece. Fortunately the kit they sent me included new trim. There are no fasteners penetrating it, with the exception of the gust lock at the top. The middle screw facing inside went through the plastic and had to come out to remove the trim. Here’s what it looks like:
With the edge trim out I moved to the window. Easy, lots of screws then remove trim. Stand it right side up out of the way where it won’t get knocked over…. you don’t want to end up with that thing 180º out trying to find the screw holes again. Then I removed the screen door hook and the rubber knobs in the corners.
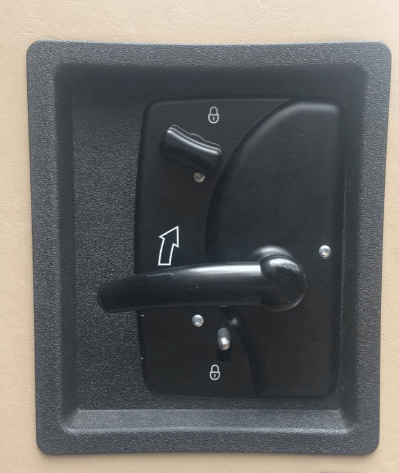
That left the trim piece around the door handle. This is tricky. The three silver screws on the inside go through the hole and into the outside handle piece pulling the two pieces together with the door in between. When you remove them, you can bring the inside piece in enough to wiggle the plastic trim piece around it and off. The inside handle part is connected with an adjustable rod to the door release mechanism, I did NOT mess with that as it would require adjusting upon reassembly. When the trim piece was out I put the two handle halves loosely back together to secure them.

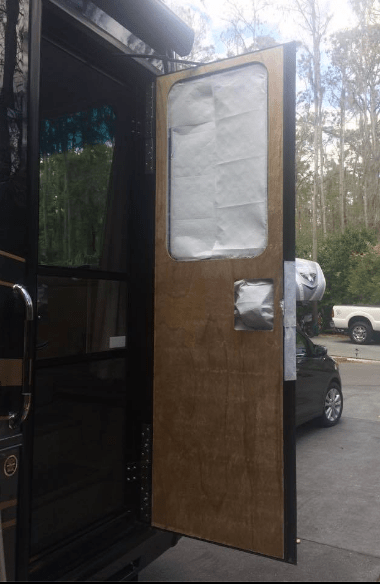
I then pulled off the vinyl. It offered very little resistance. Looked like the aforementioned meth head cut the amount of glue too.
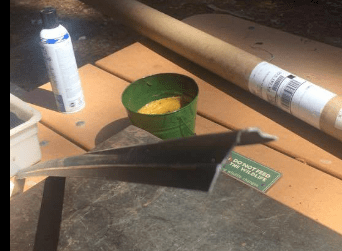
Now it was glue time….. The kit included a can of “FUZION” for “HARD TO BOND SUBSTRATES”….. never heard of it. I can guarantee you that this will become a permanent part of my tool box. This stuff is GOOD, basically contact cement on steroids. And it sprays in a very interesting pattern….. no blobs whatsoever. The instructions give you the choice of spraying one or both sides. I only sprayed one side, the wood, so I could still loosen and move the vinyl around if need be. Spray both sides and whatever you put together is staying that way!

I taped off the window and the lock mechanism with paper towels and scotch tape. I used a manilla file folder in the groove around the wood to protect against overspray there. (Hey, I’m on vacation I have to improvise…..) Luckily there was no wind to speak of! I sprayed the glue on to the wood and waited about 5-7 minutes. The can says “dried to a tack”….
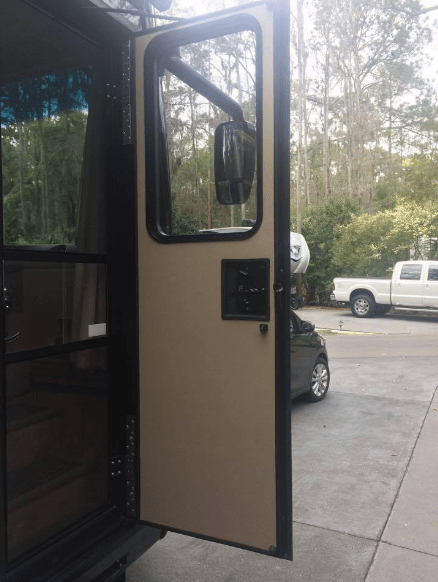
I then applied the new vinyl. I started at the top, and had the sheet rolled up 3/4 of the way and the rolled part secured with clothes pins. It was plenty oversized so no worries about falling short anywhere. I used a soft rag to press the stuff in to place, taking care NOT to stretch it and slowly unrolled it and worked my way down. There were surprisingly few issues with wrinkles or bubbles. It was most cooperative. Once it was on I trimmed off the excess and the window and handle openings with a razor blade. I wish I had more than one because for some strange reason this stuff dulled the one I had fairly quickly.
I then put the bits and pieces back on. There’s some trimming on the edge trim around the lock. Again the stuff is fairly brittle so cutting shears and such only make it split the wrong way. I used a utility knife to carefully and slowly make small cuts, and a small, fine hack saw for the larger ones. Putting the lock back together is a little fidgety but as I didn’t mess with any adjustments it came out OK. Of course having it apart was a good opportunity to apply some lithium grease to the moving parts. And viola, all pretty again:
The only follow up I have is some paint touch up on the outside. These coaches are painted LAST during manufacture. (As evidenced by the masking tape remnants one finds everywhere, including the outside piece of the door handle). So, moving it broke the paint seal and in some places there is a tiny sliver of white (the base color) visible. You have to look for it to see it, but of course I do……
